EV Cockpit: your BYD on your PC
What is this? A free program that shows your car on your own PC.
Who is it for? For anyone who wants to see more than the BYD app shows, without a tech project.
How do I start? Download, unzip, double-click. A wizard asks the rest.
Version 1.24.1 · What's new? (German) · Source code on GitHub · German or English, follows your browser
Important: create a second BYD account. The BYD cloud allows only one active login per account. If you use the same account as in the phone app, the two get in each other's way. In the BYD app, create a second account (with a different email address) and share it in the car as an "additional user". Then both work side by side.
New in Cockpit 1.24: plan a route
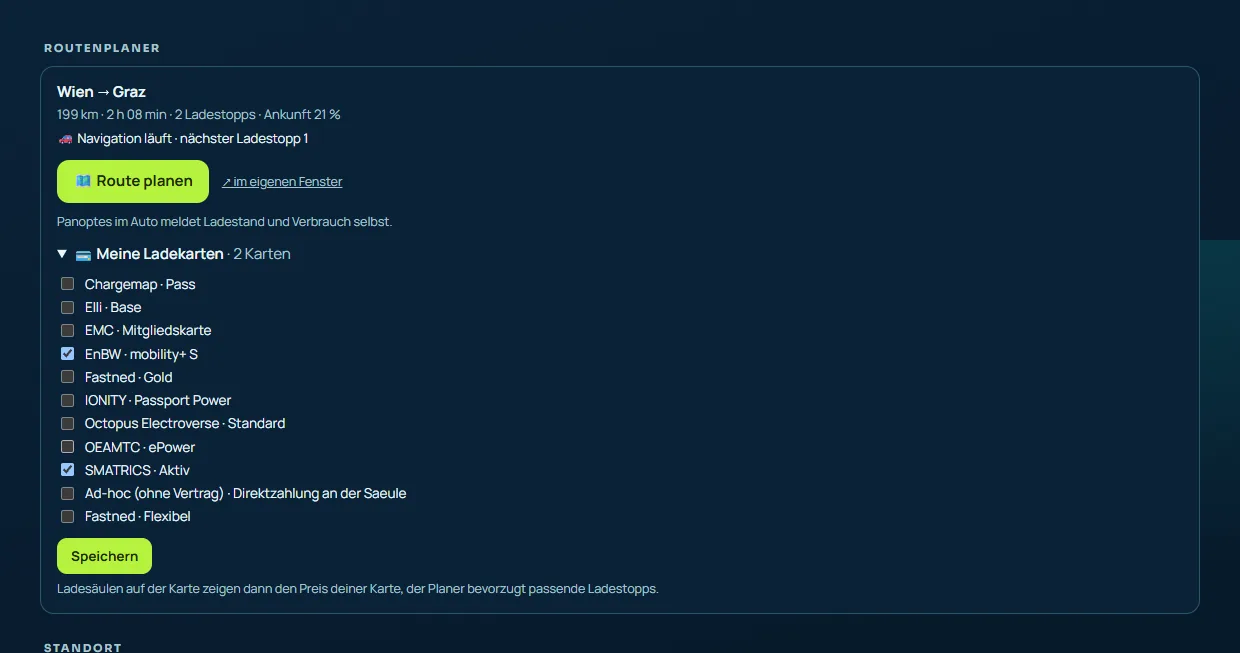
- Plan a route. Enter a destination, tap “Route berechnen” (calculate route). The Cockpit shows in big letters whether you will make it and how much battery you arrive with. Plus arrival time (with traffic jams when known), distance, charging time and cost. Below that, the charging stops with charge level, price, charging card and free chargers.
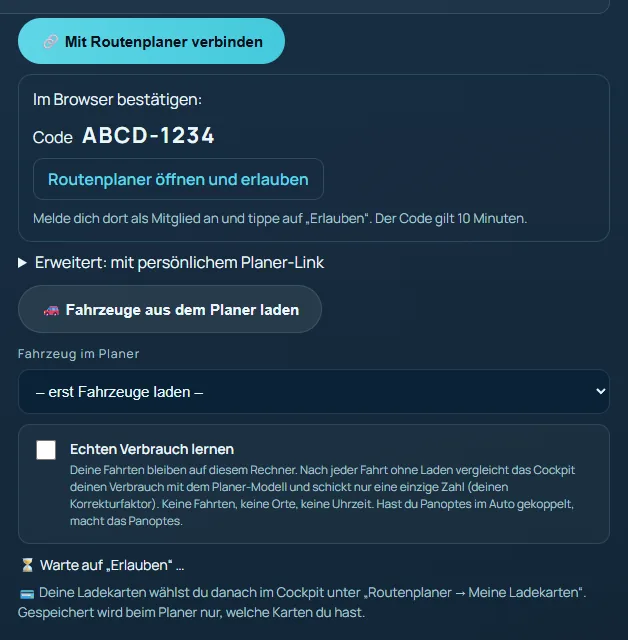
- Send to the car. One tap sends exactly this route to the car. There you tap “Route übernehmen?” (take over route) once. The start is your car or a place you enter, never the location of your PC.
- Tidied up. On every page the sections start folded. One tap opens one, the previous one closes.
- Connect once. For “Route planen” you connect the Cockpit once to the route planner (settings).
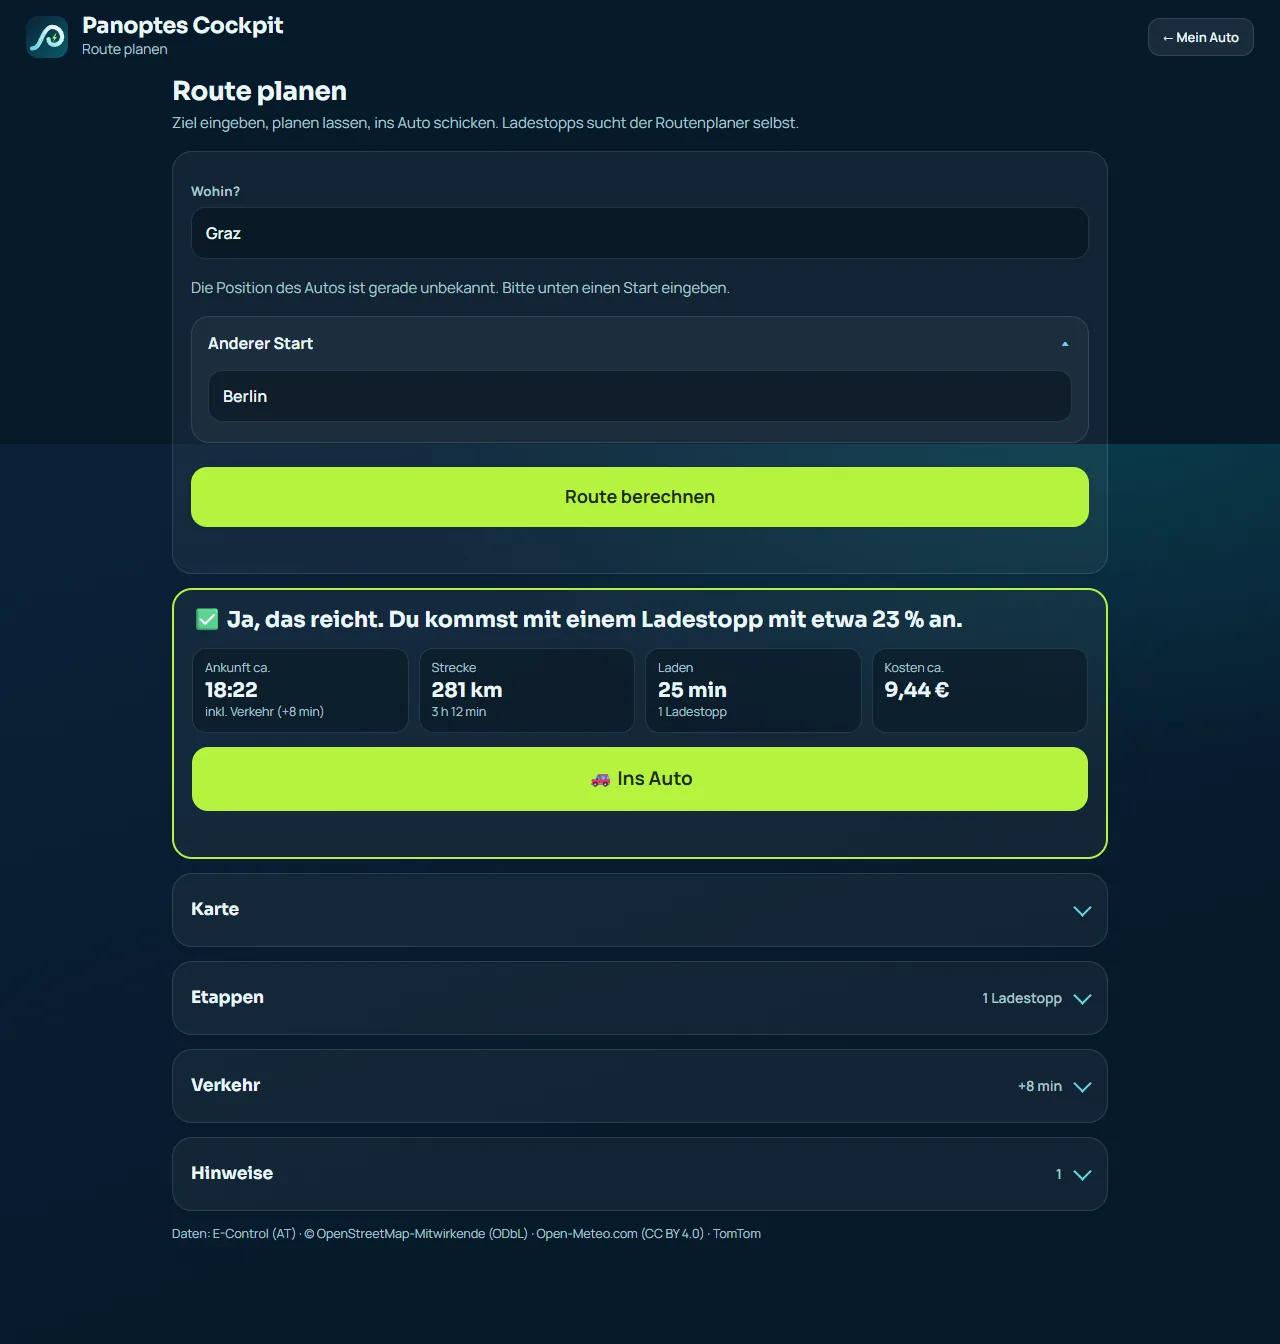
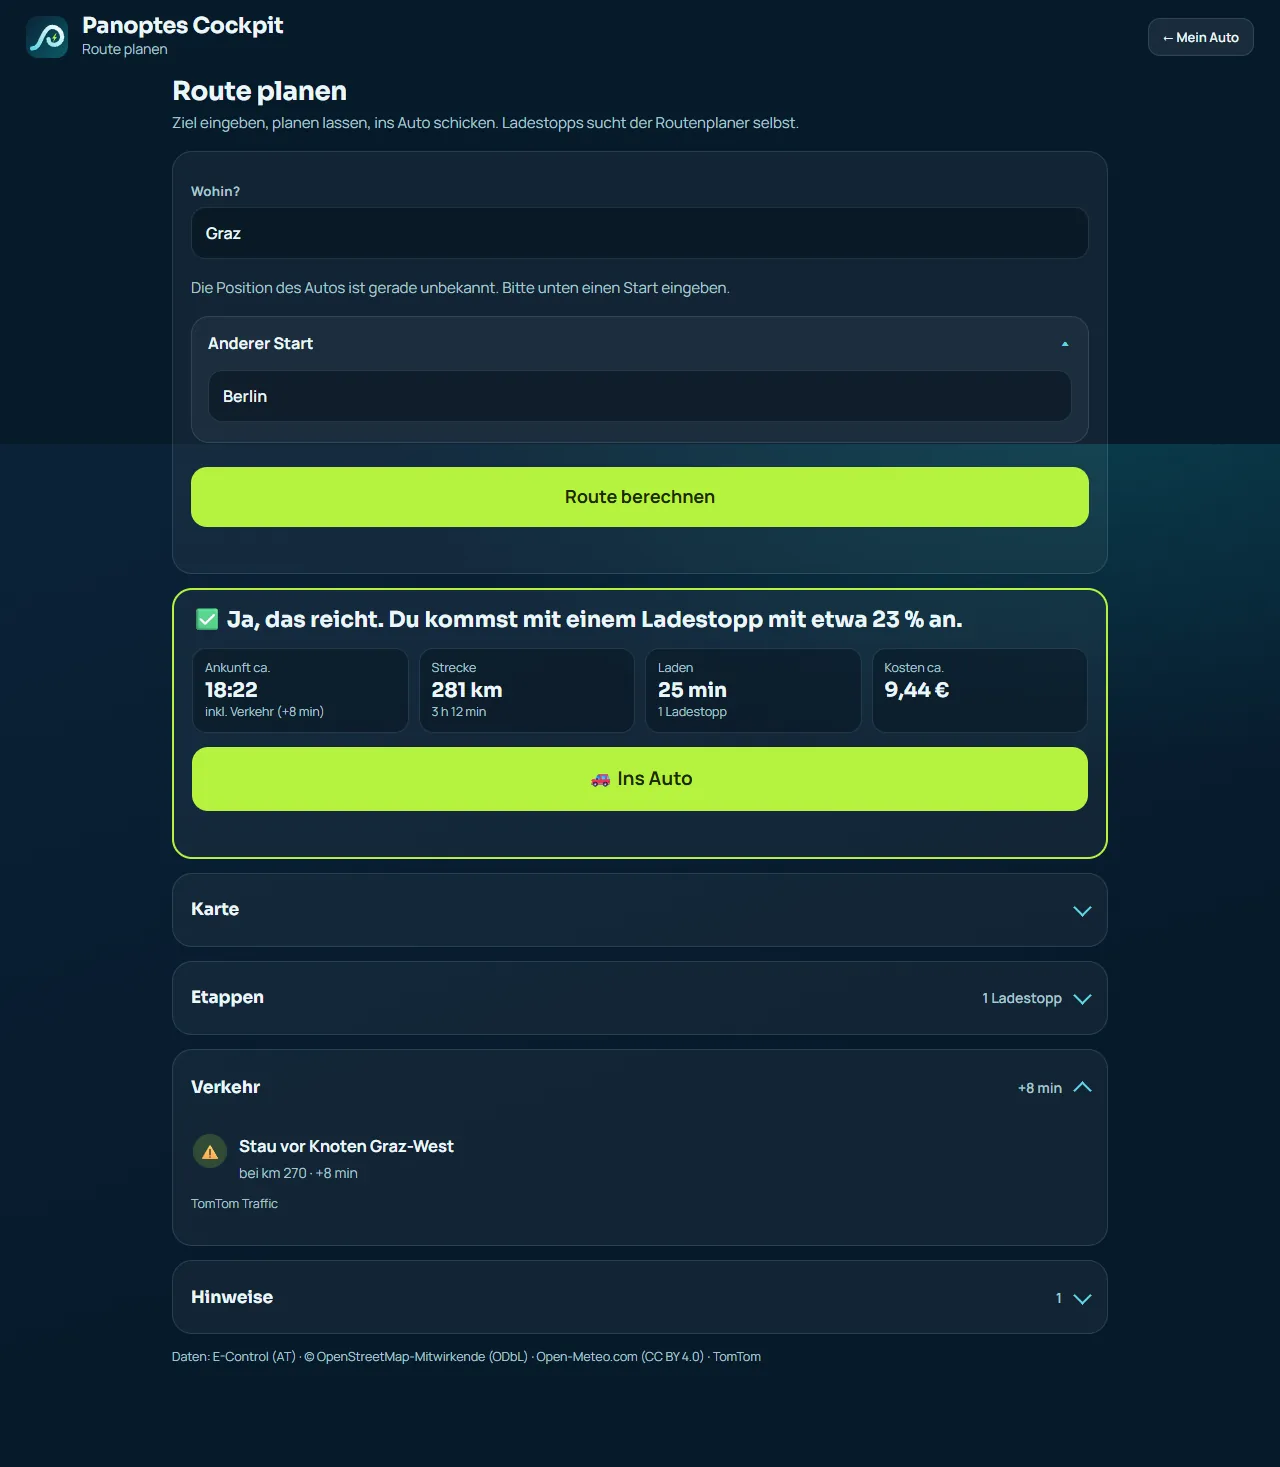
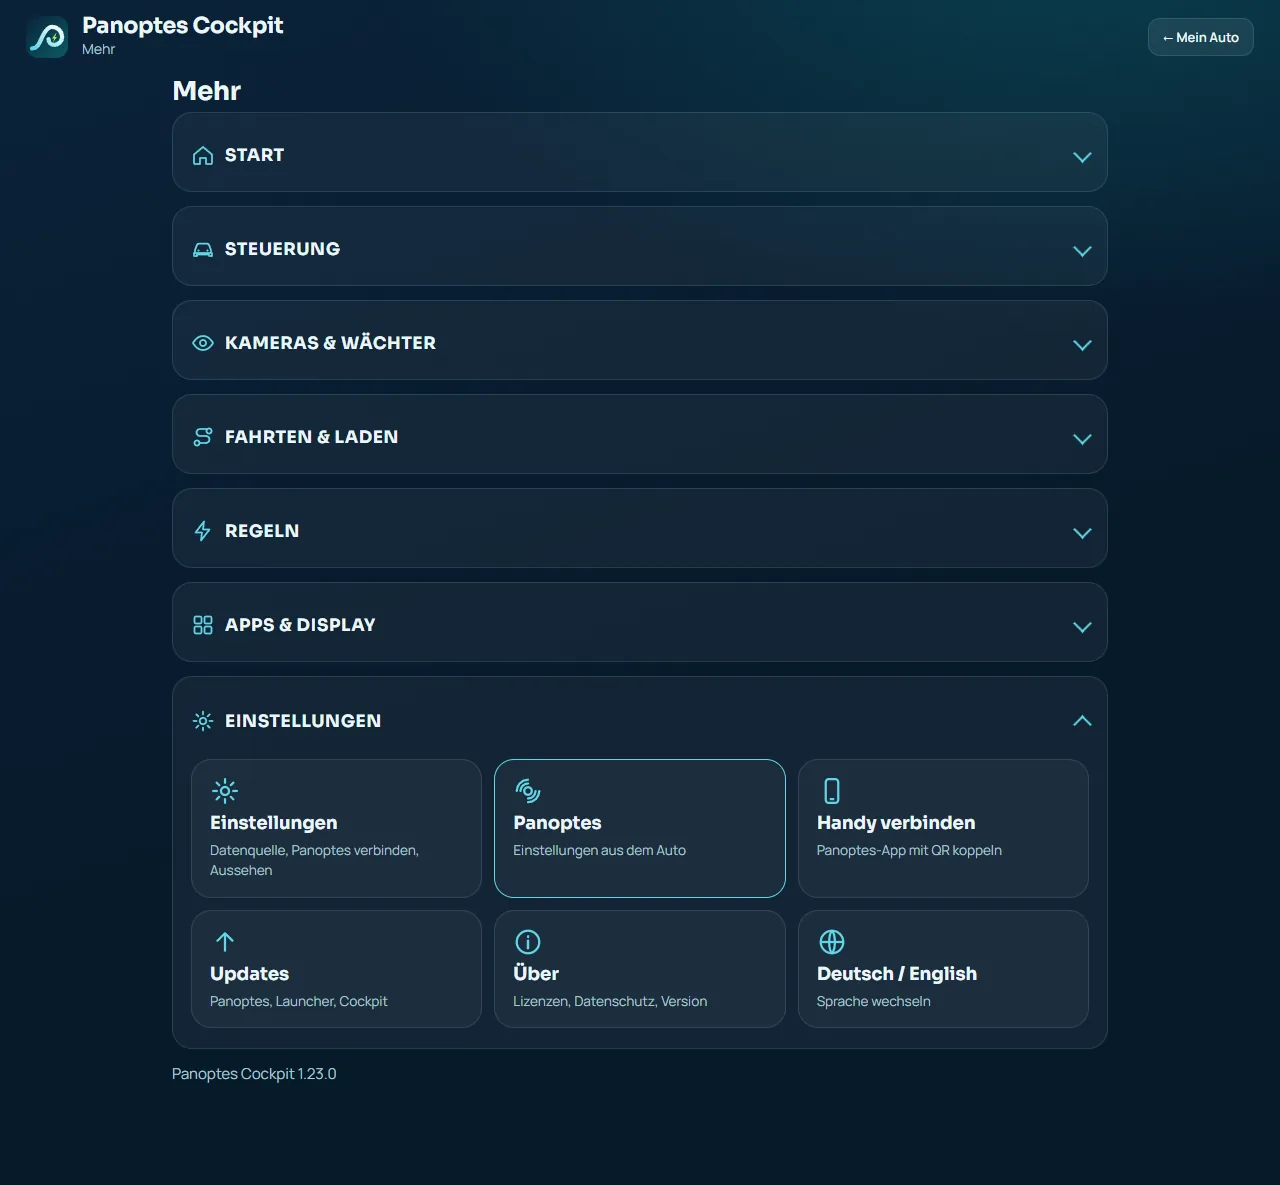
The pictures show sample data, not a real trip; the Cockpit is shown in German.
New in Cockpit 1.23: organised like Panoptes 0.1.38
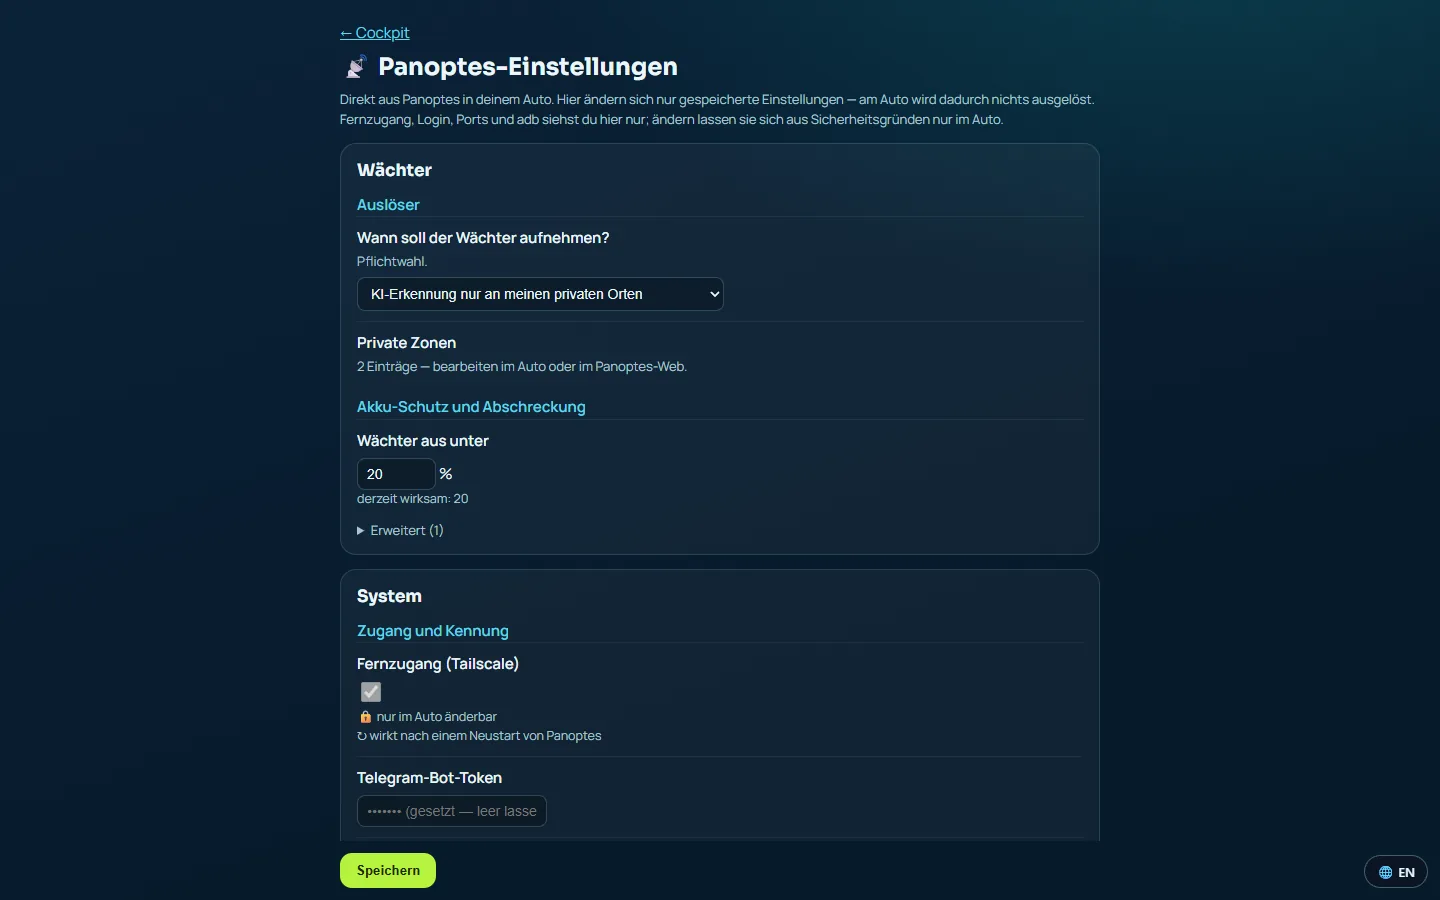
- Same order as in the car. “More” shows the same 7 areas as Panoptes: Home, Controls, Cameras & guard, Trips & charging, Rules, Apps & display, Settings. Anything your Cockpit cannot do is not shown.
- What does the cluster show? Choose on your PC what appears behind the steering wheel: one of 5 displays or an allowed navigation app. One button brings the normal cluster back at any time.
- Set up the launcher. Arrange the Panoptes Launcher home screen comfortably on your PC: move and resize tiles, add apps, sort the bottom bar, pick the background. Every change applies in the car right away.
- Updates in one place. You see whether there is a new version of Panoptes, the launcher and the Cockpit. You install Panoptes and the launcher with one button; the Cockpit asks first. If the car is on, Panoptes installs after you switch it off.
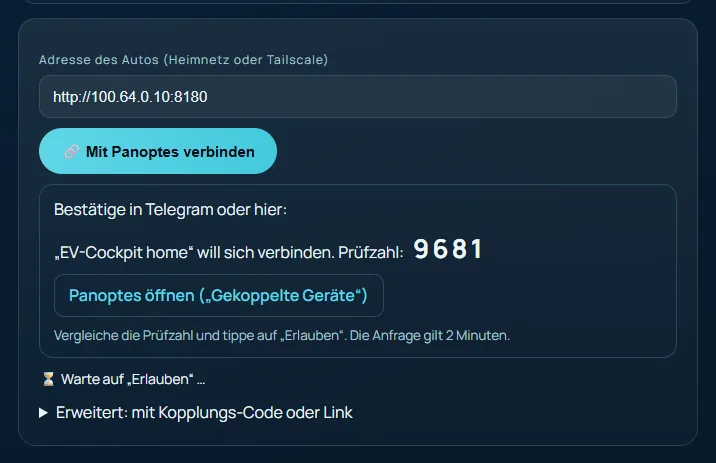
- You decide. The Cockpit only changes what the screens show, no lights and no sounds. It needs Panoptes 0.1.38.2. To do this, tap “Set up control” once on the Cockpit home page and confirm it in the car. Then tick “Tacho”, “Launcher” and “Update” in Panoptes under “Gekoppelte Geräte” (paired devices).
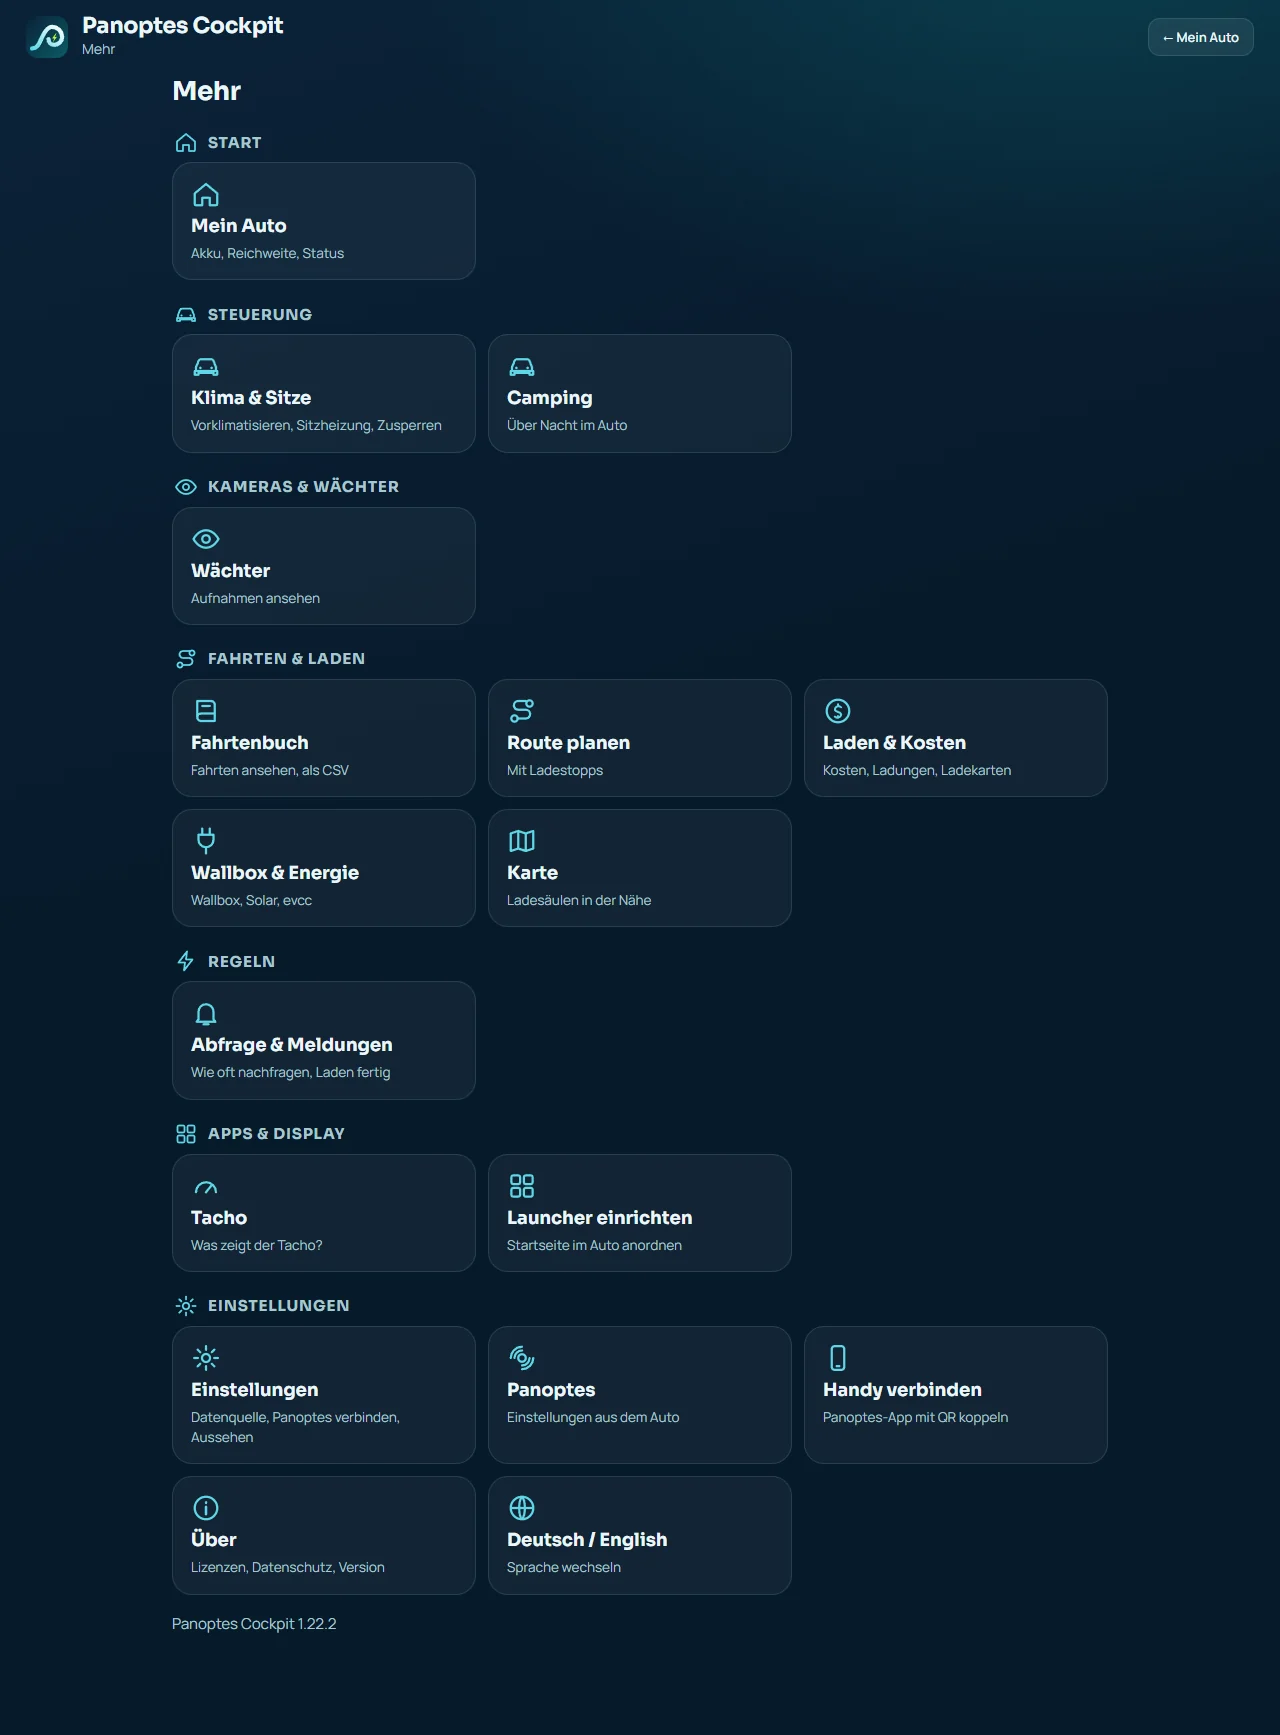
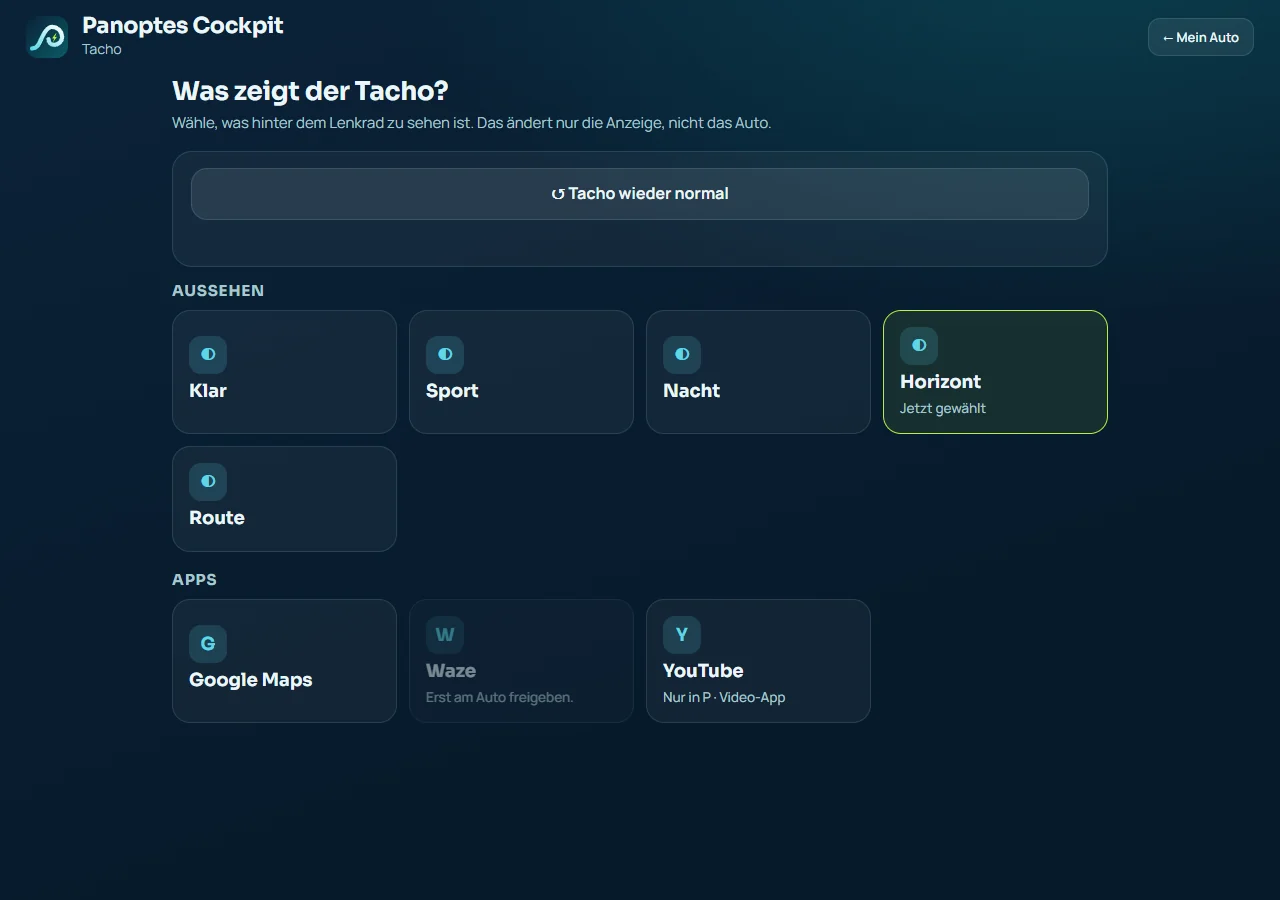
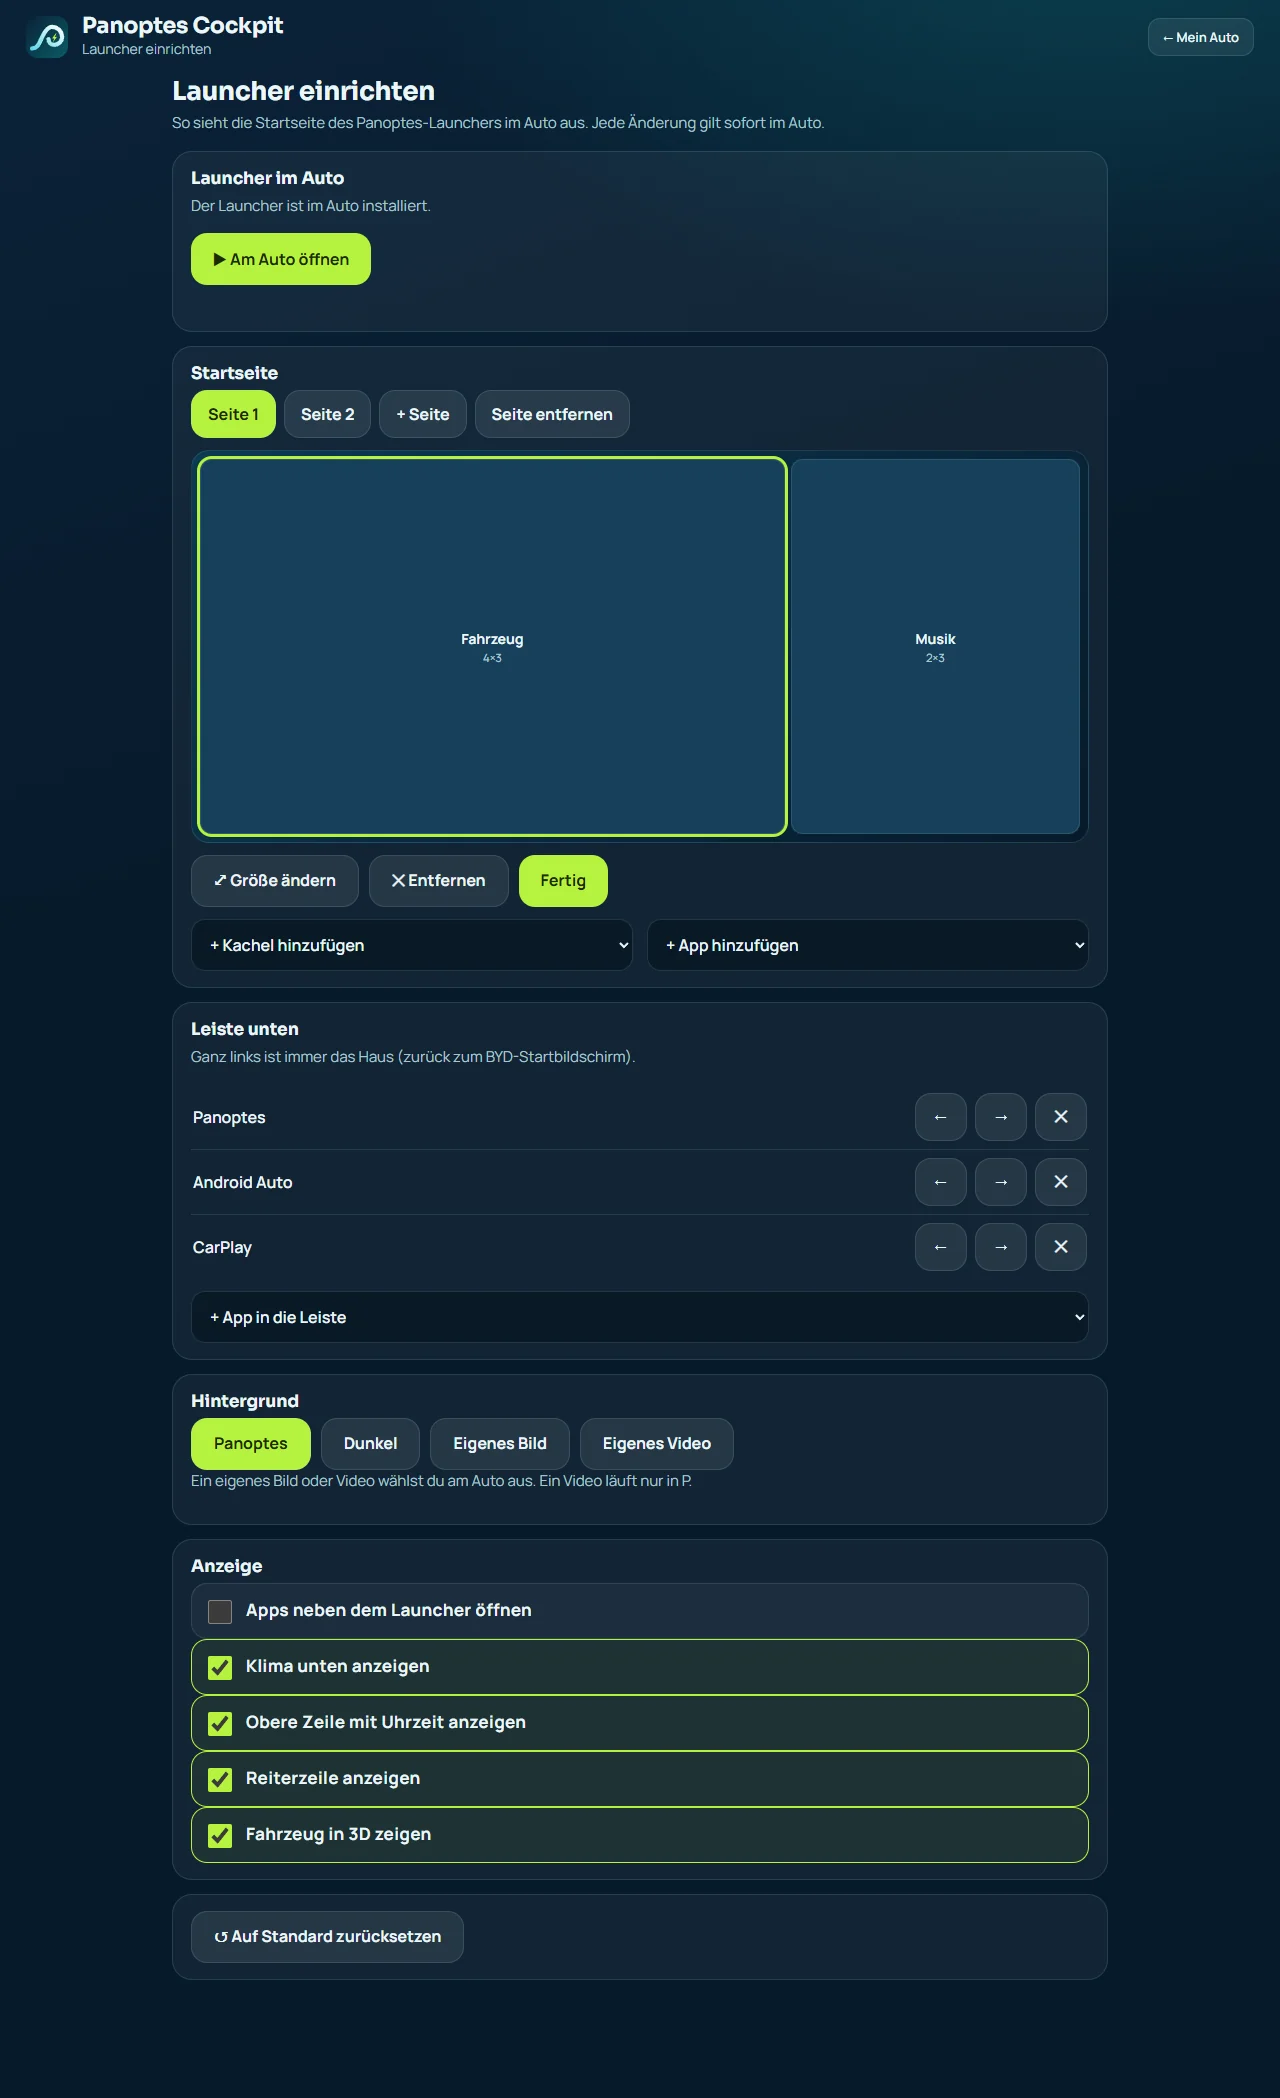
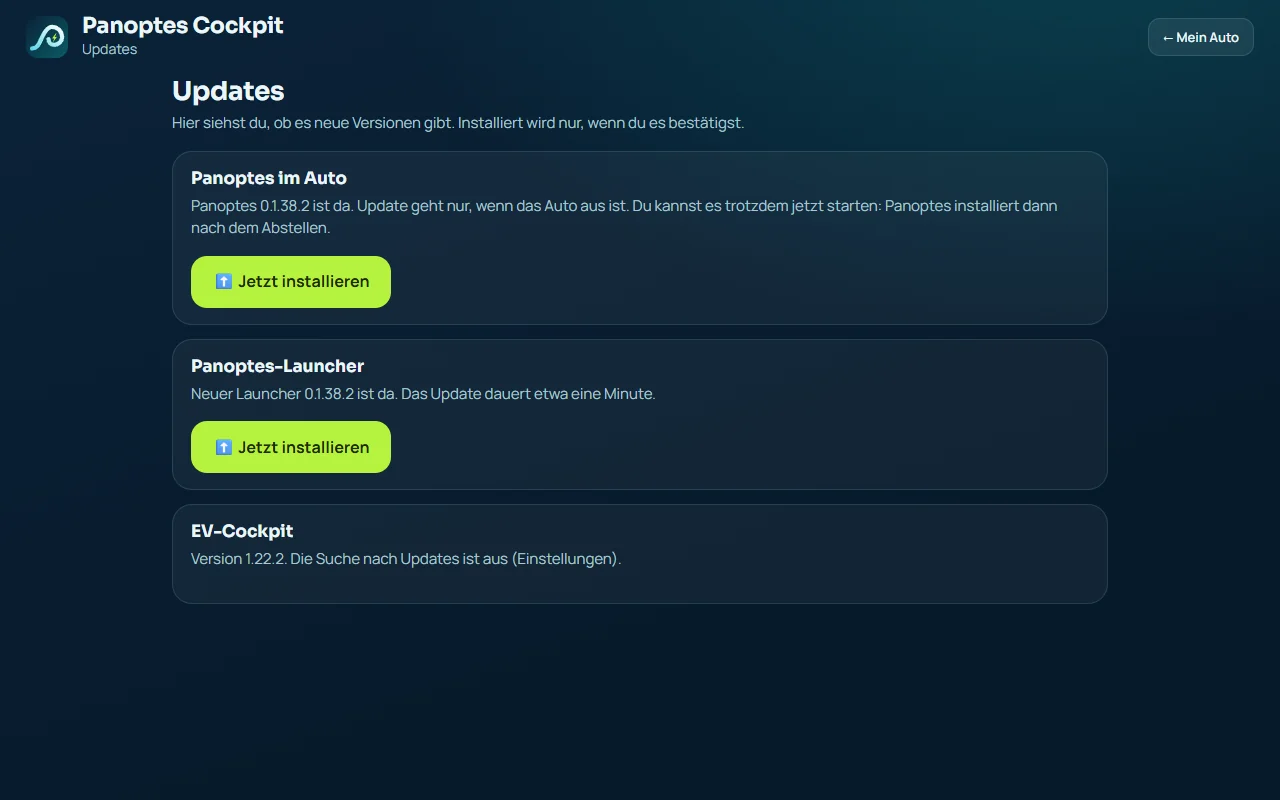
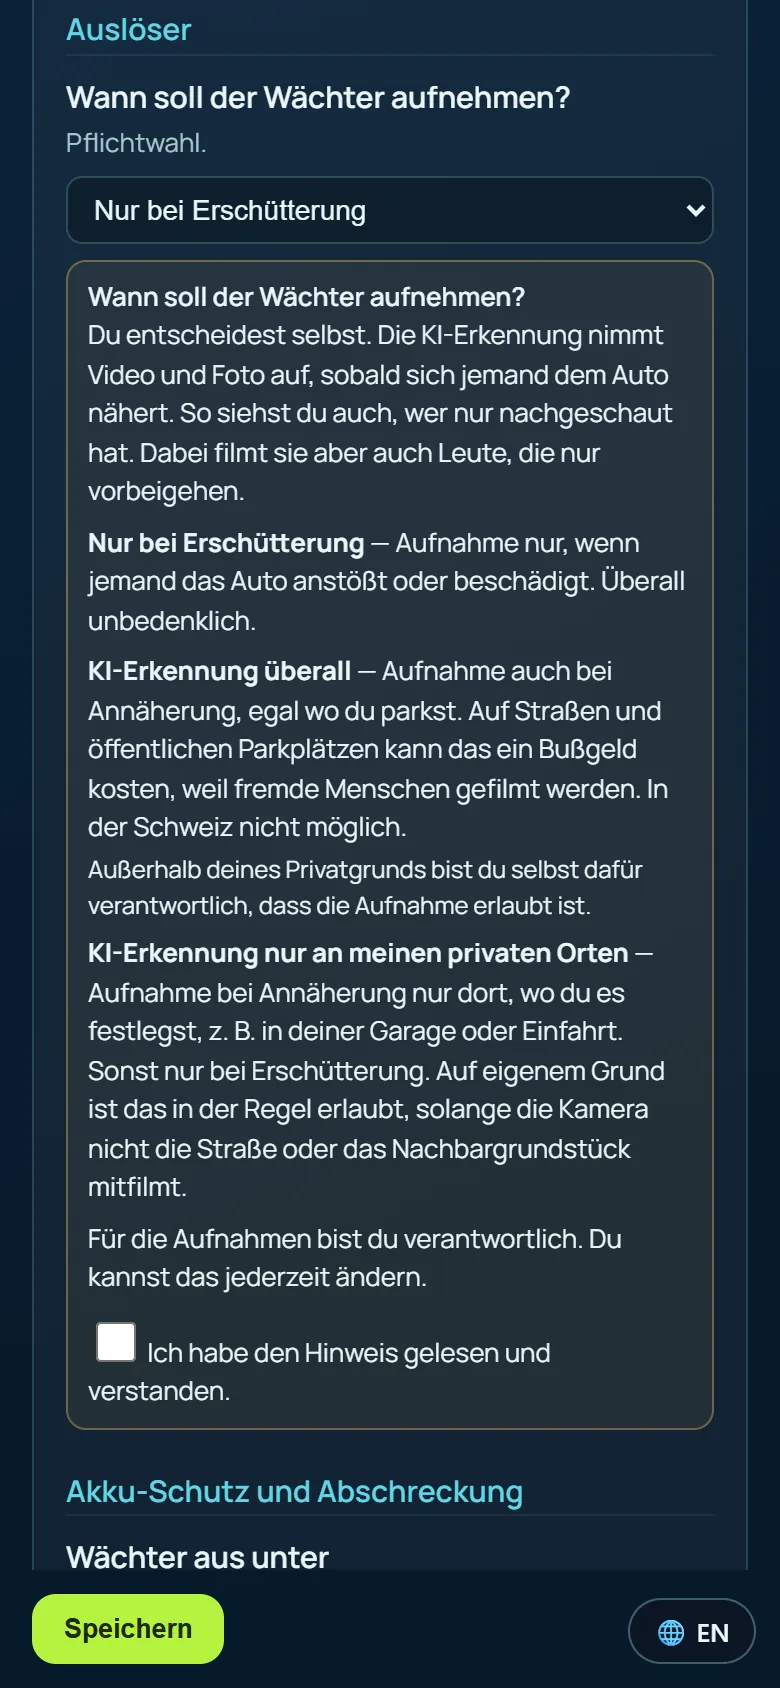
The pictures show sample data, not a real car; the Cockpit is shown in German.
Which way suits you?
Just look and pre-heat
The BYD app on your phone is enough for this: battery, range, location, pre-heating, locking. You do not need to install anything.
See more, on the PC
The EV Cockpit: big screen, honest range, costs, wall box, map. It gets the data from the BYD cloud, from Home Assistant or from Panoptes.
Panoptes already runs in the car?
Then the Panoptes interface is your cockpit. You only need the EV Cockpit in addition for wall box and solar (PV) on the PC.
To plan a route with charging stops, use the route planner (German). It is public and needs no login.
How to set it up
- Download and unzip.Windows: unzip the ZIP file and double-click
Start.bat. Python is already included, so you install nothing. Linux, macOS and Raspberry start with one command (it is in the LIESMICH.txt, a German "read me" file). - Confirm the Windows warning.On the first start you may see "Windows protected your PC". Click "More info" and then "Run anyway". This appears because a signature costs several hundred euros a year. For a free tool, nobody pays that.
- The wizard asks five things.The note about the second BYD account, where the data comes from (BYD account, Home Assistant or Panoptes), your model, a photo of your car and optional extras.
See pictures of the setup (5)
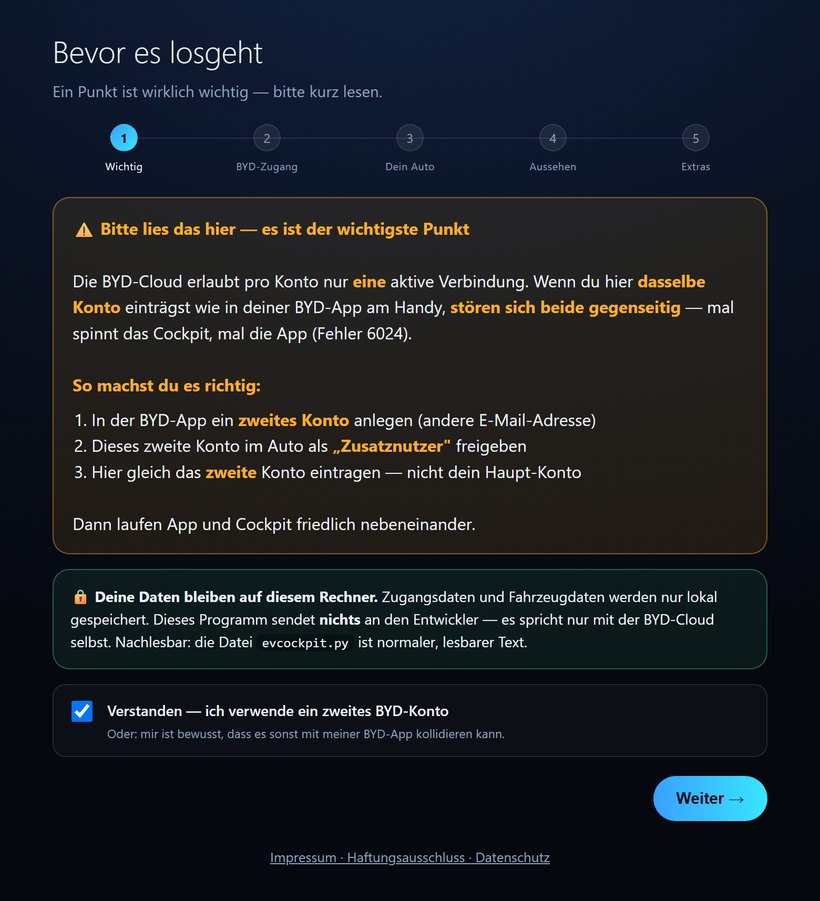
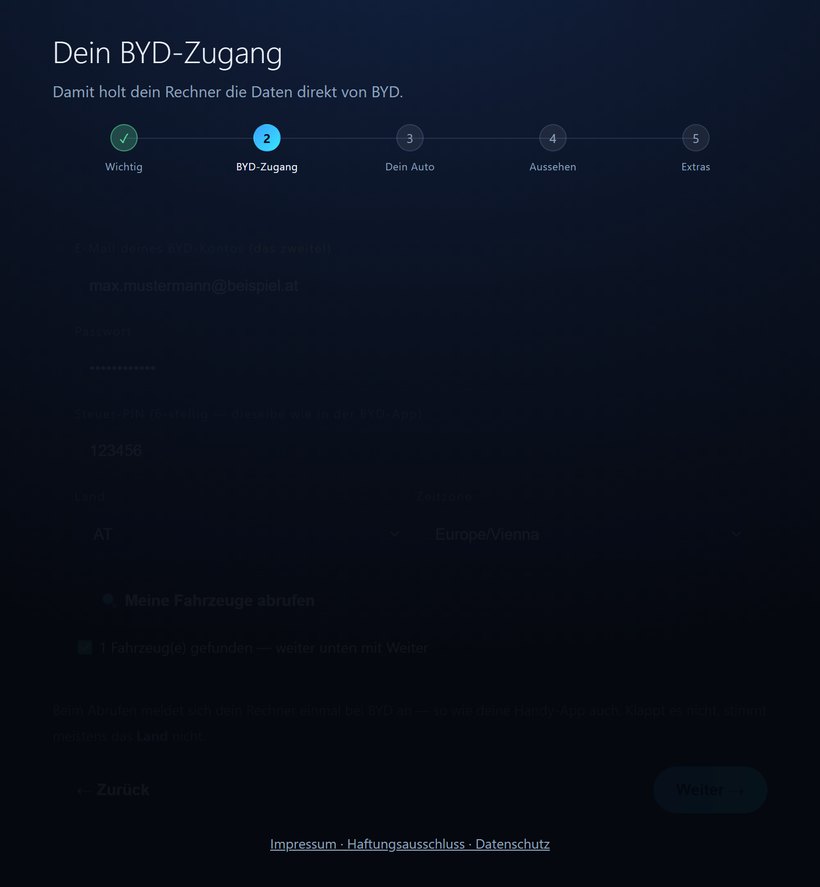
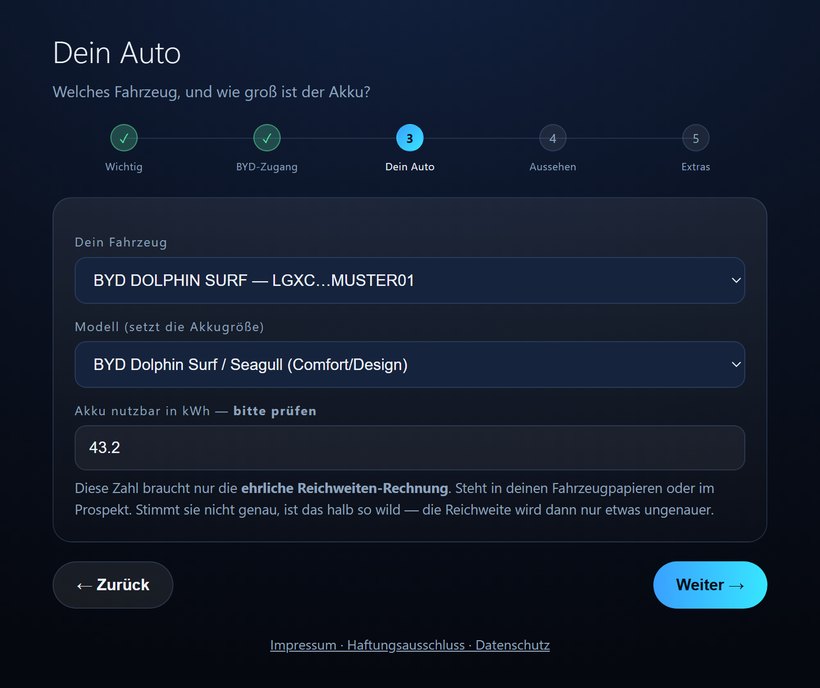
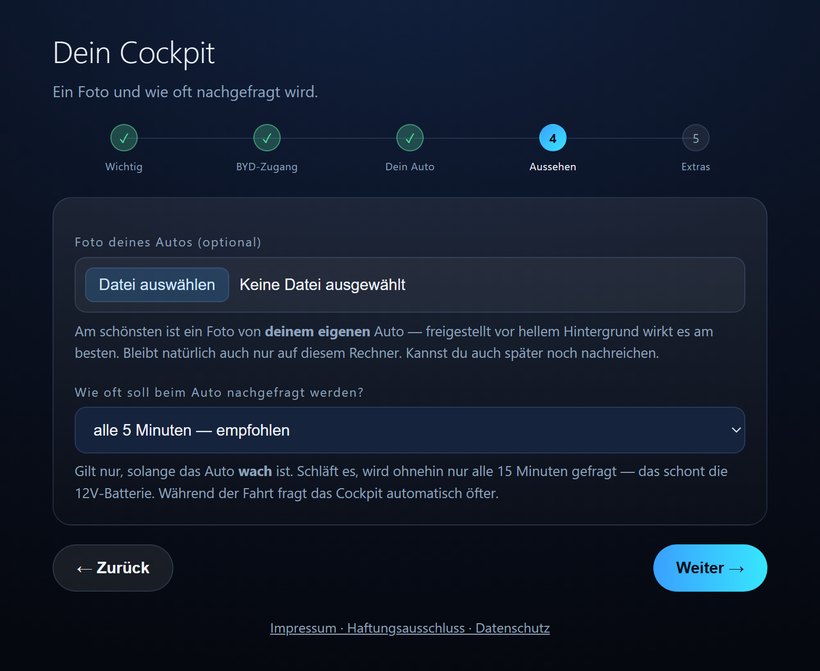
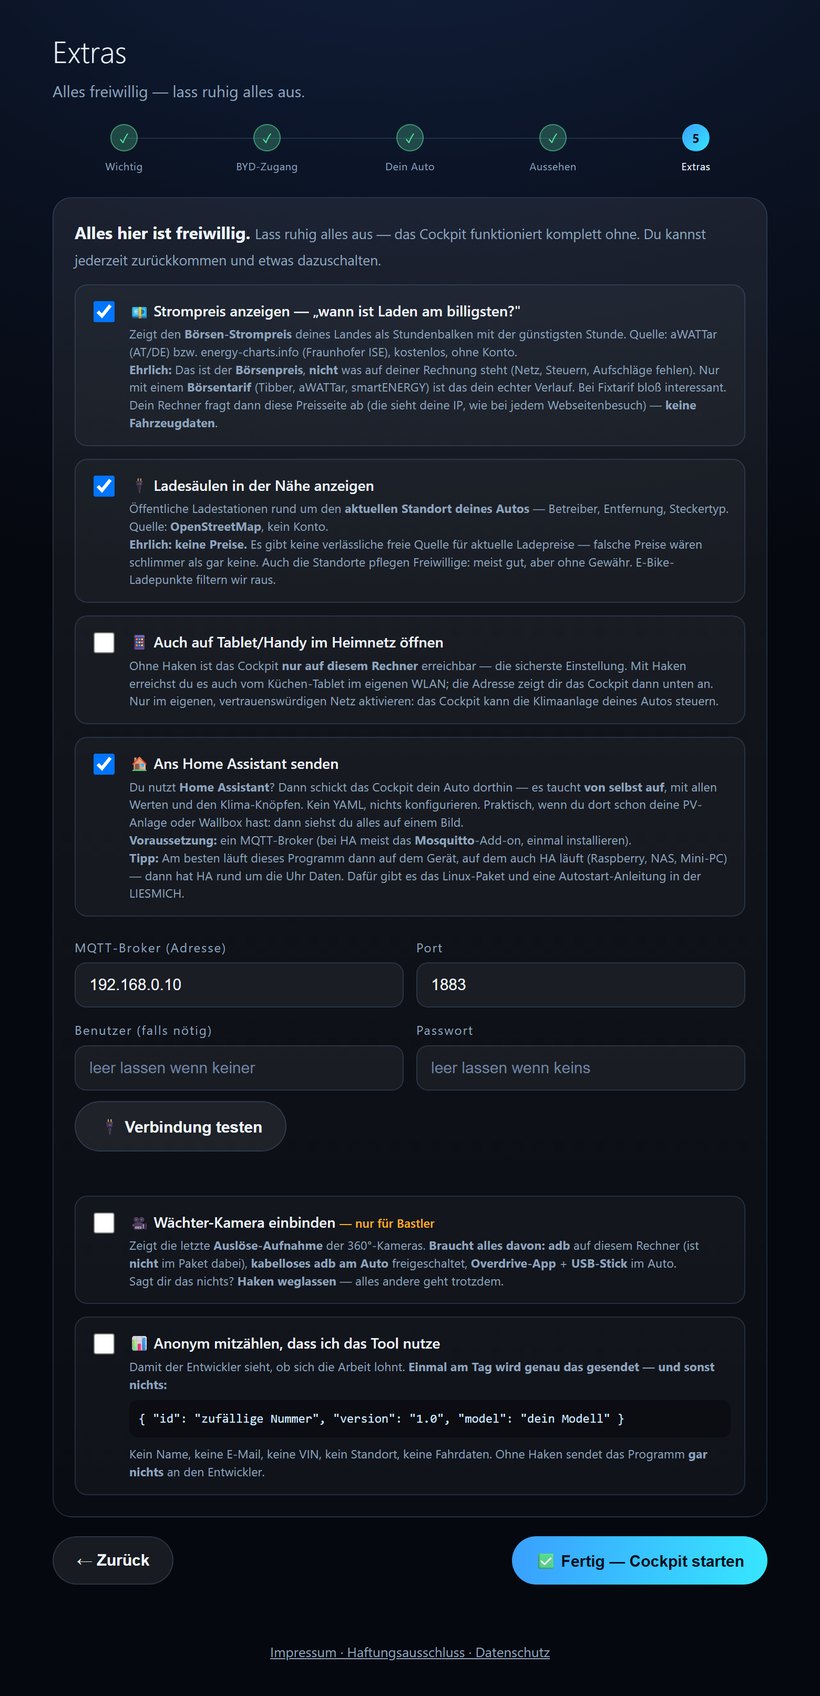
Real screenshots from the program. The entries in them are made-up sample data.
What you see then
- Charge level shown large in percent, with the kWh next to it.
- Honest range, calculated from your real consumption. The figure from BYD is shown next to it.
- At a glance: locked, doors, windows, plugged in, charging, gear, odometer, tyre pressure.
- Pre-heat or cool with a button. Only when the car is off; the cockpit checks this before every command.
- Location on the map and your car in 3D in your colour, or a photo of your own.
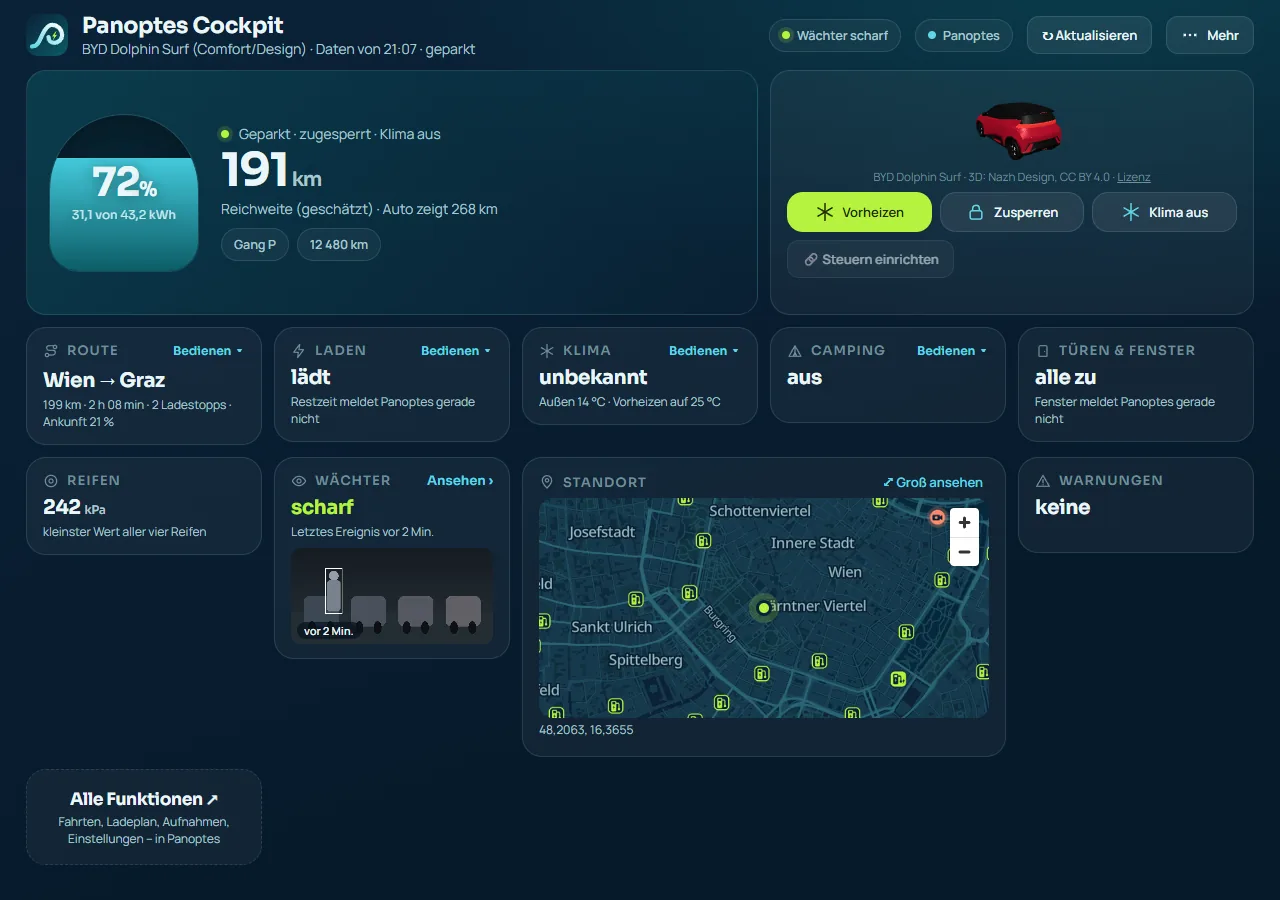
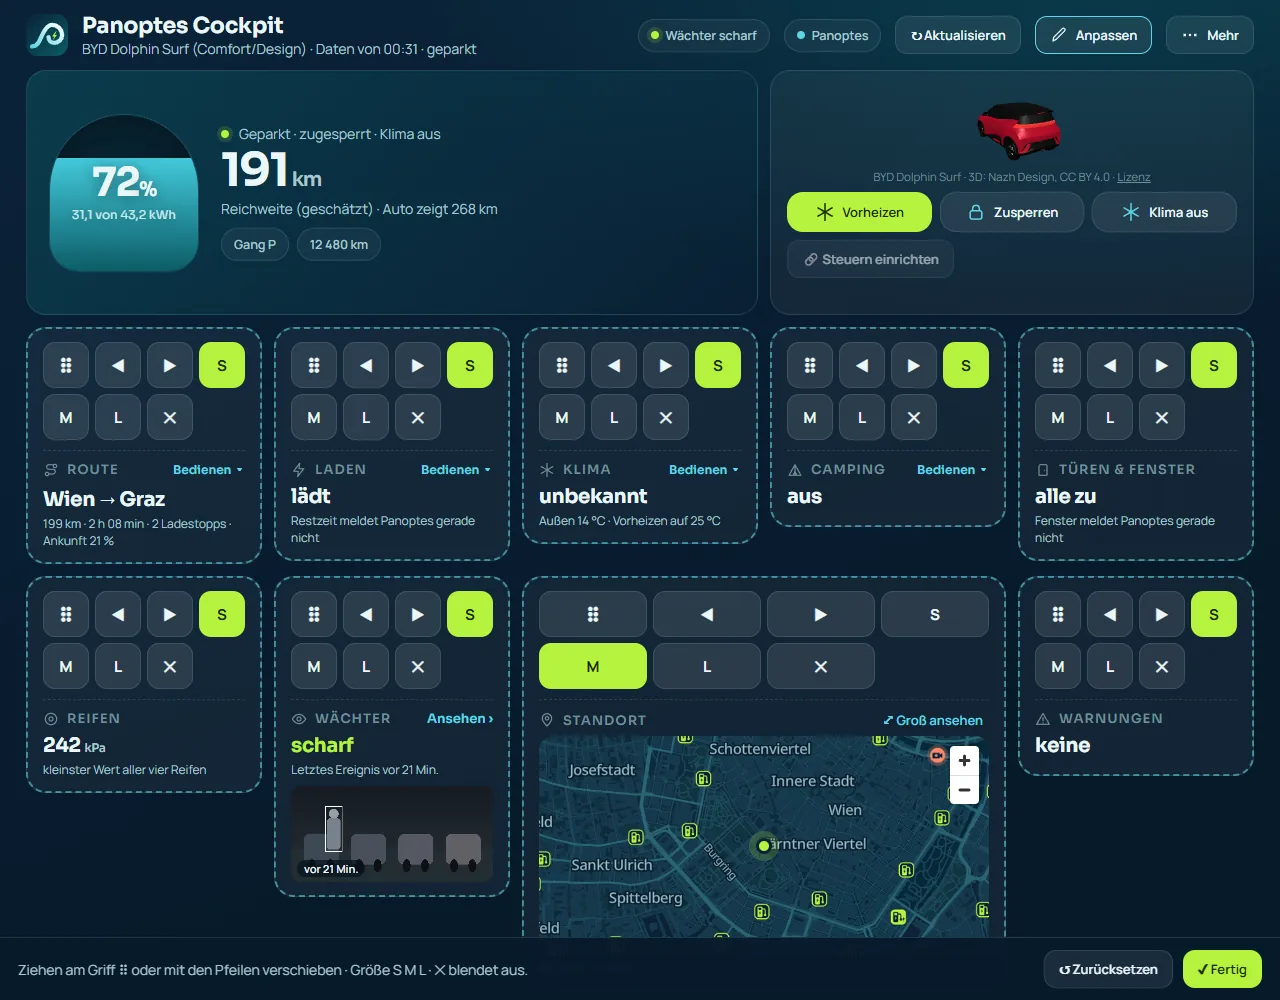
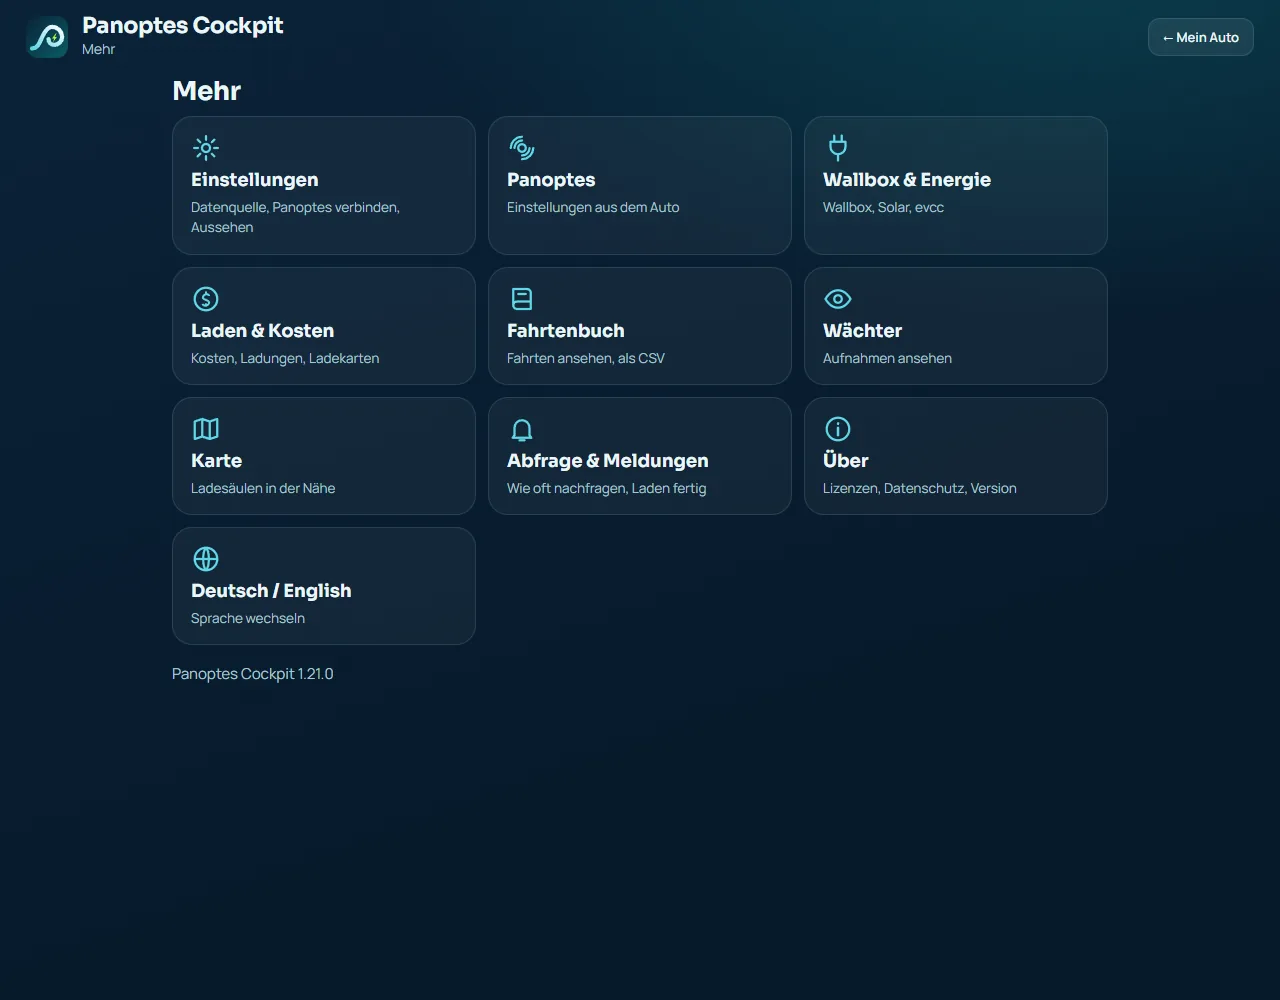
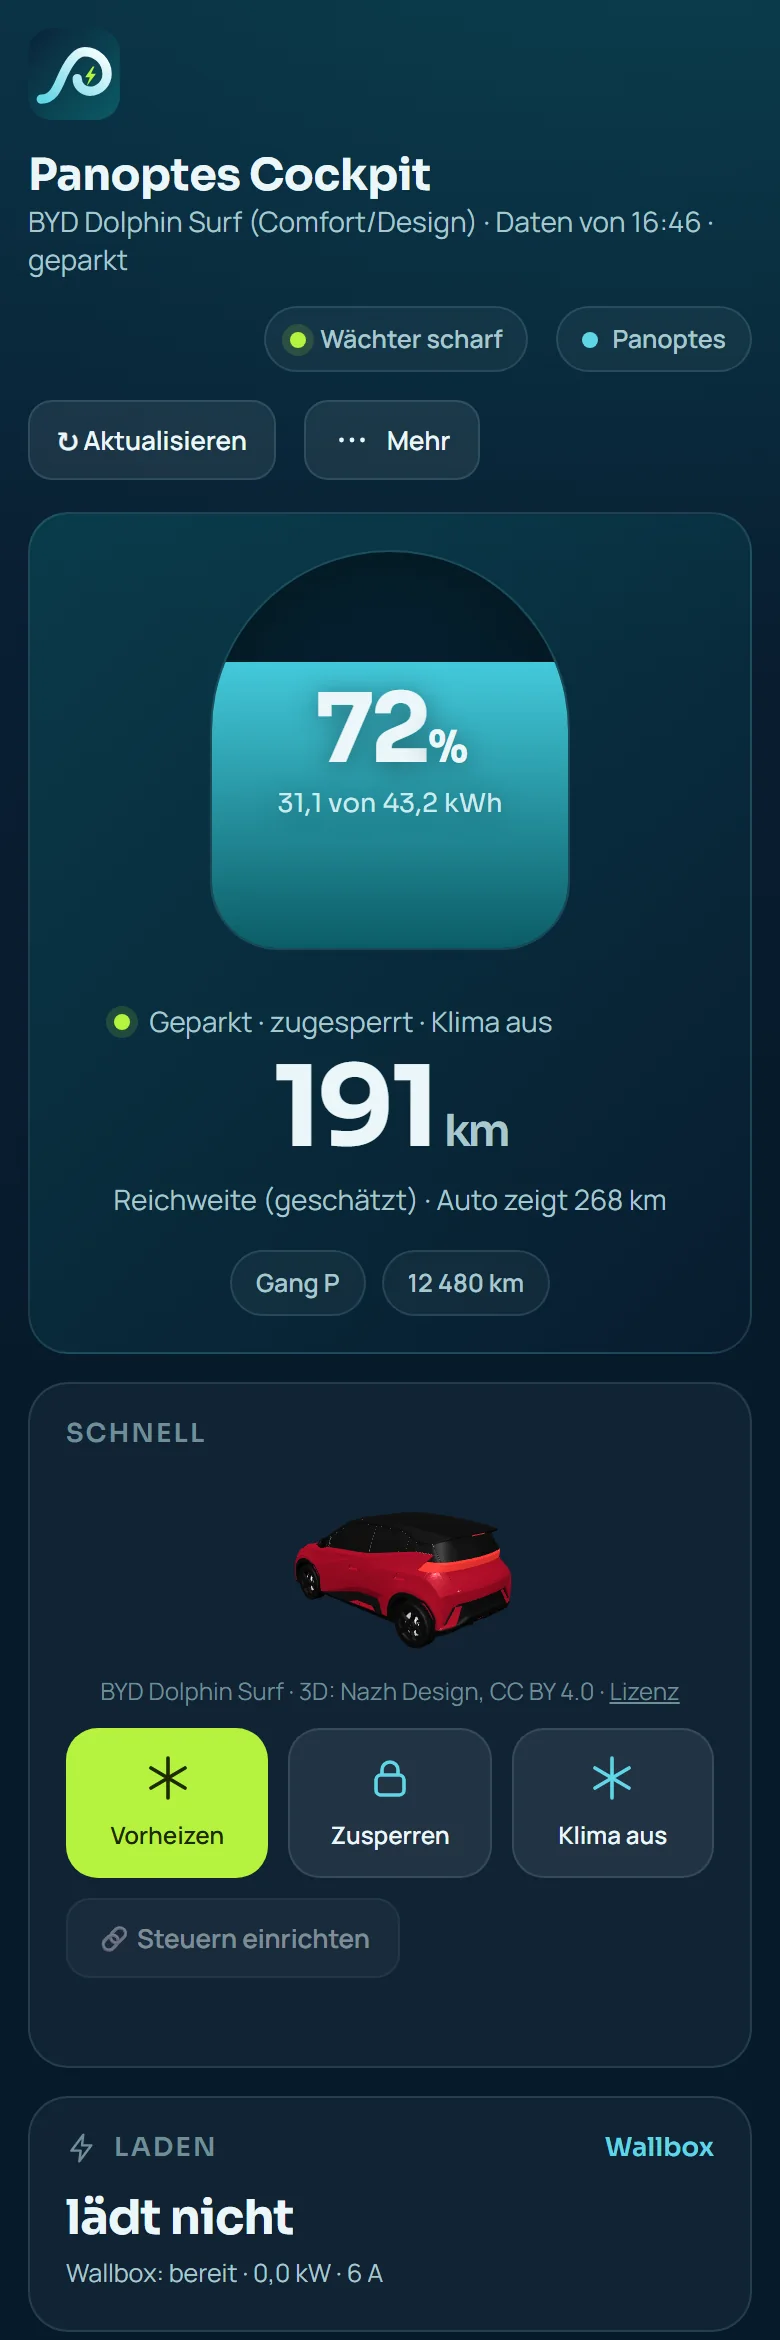
See more pictures (16)
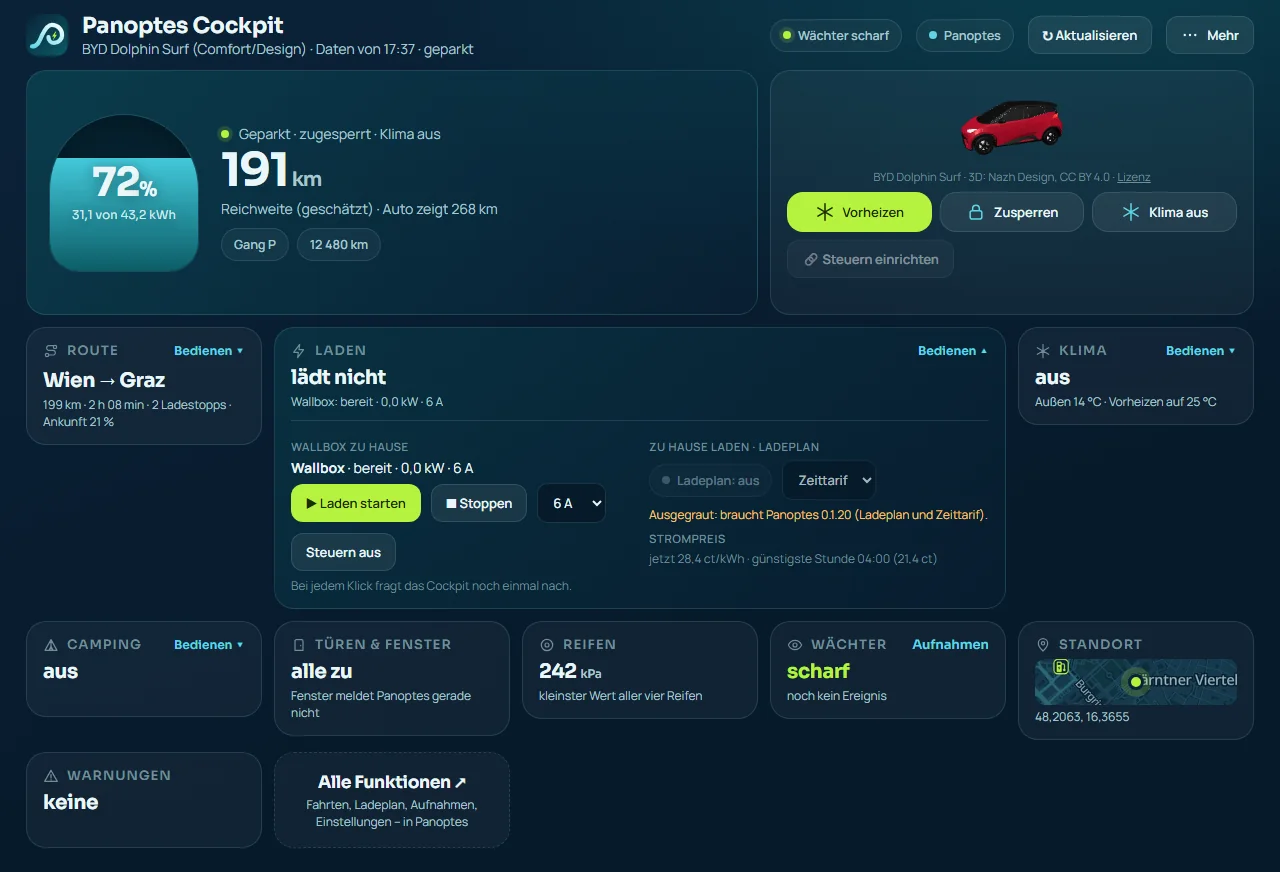
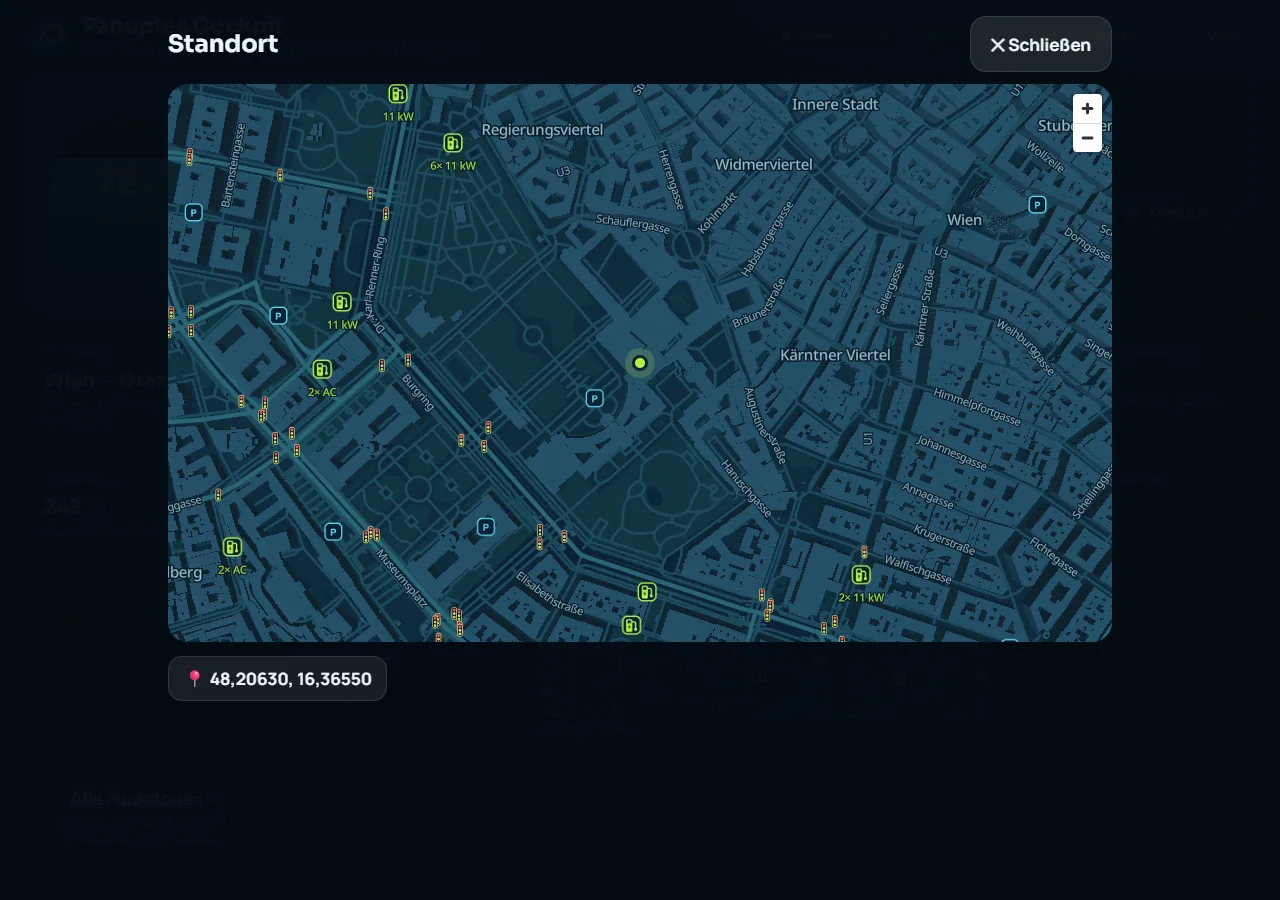
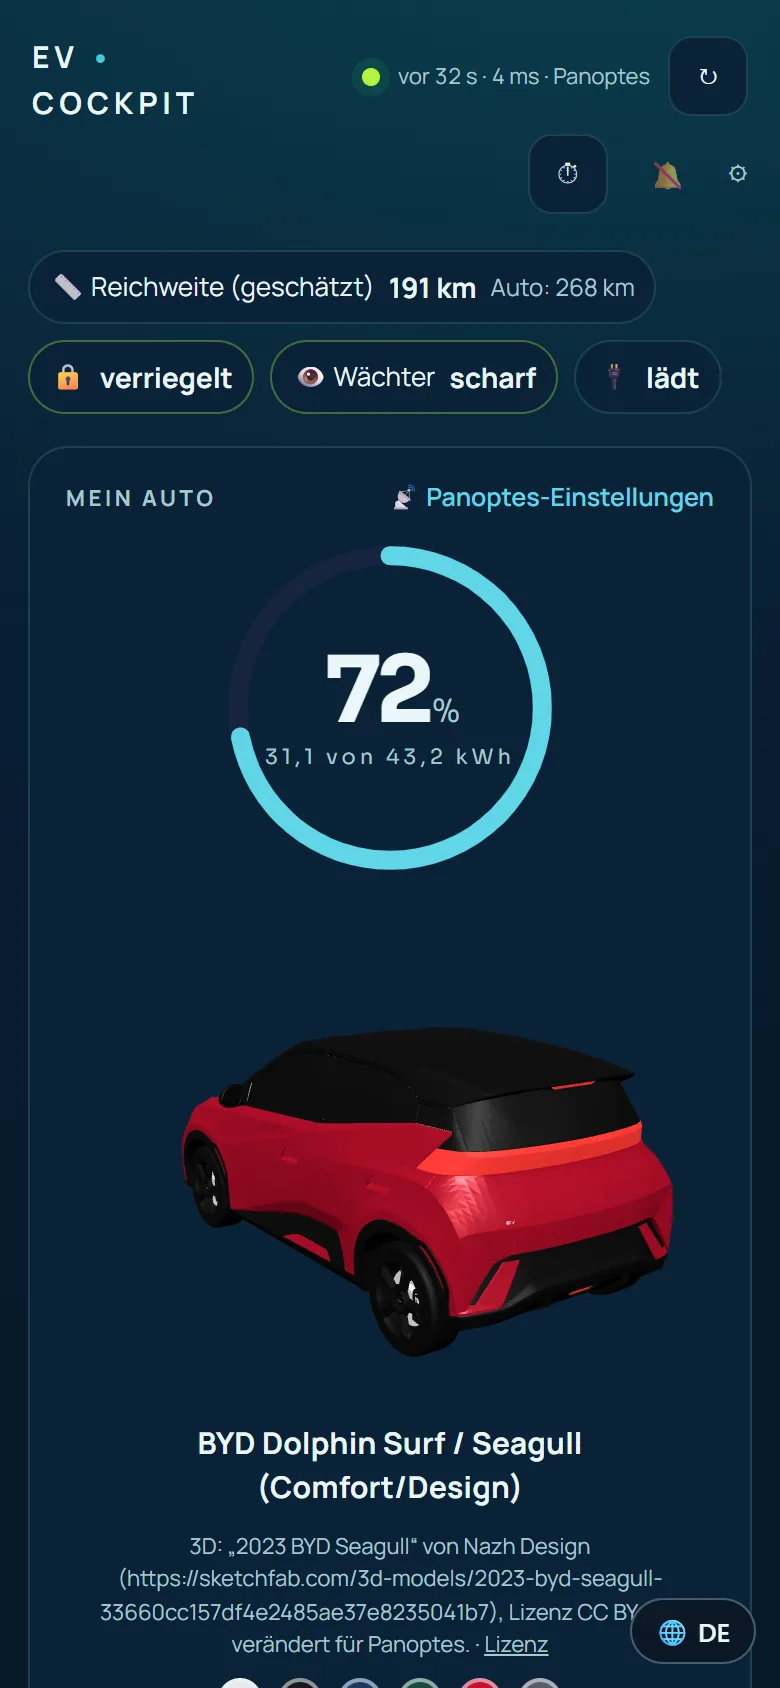
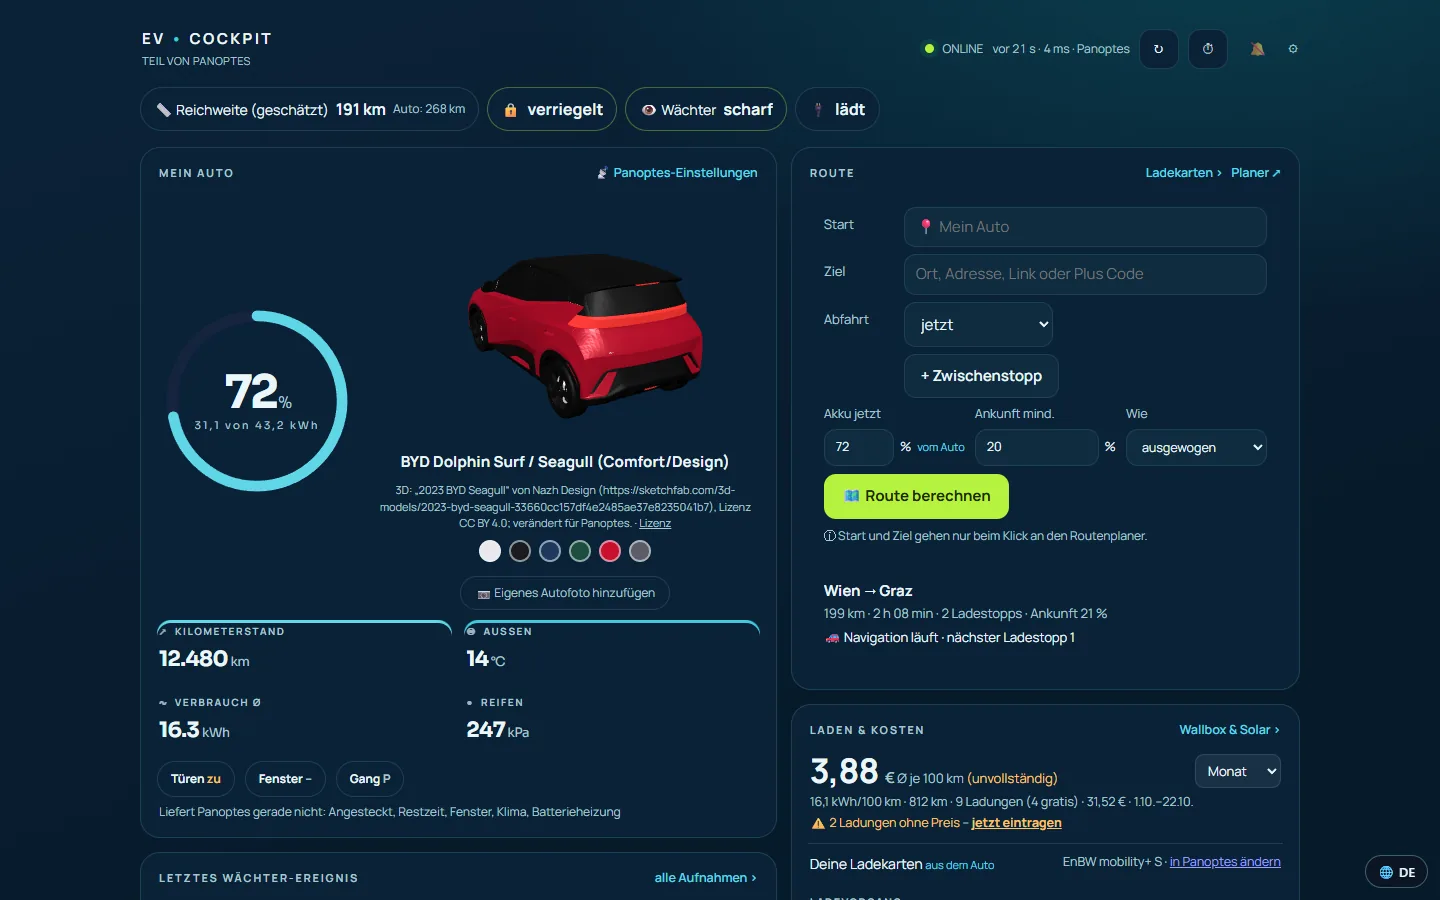
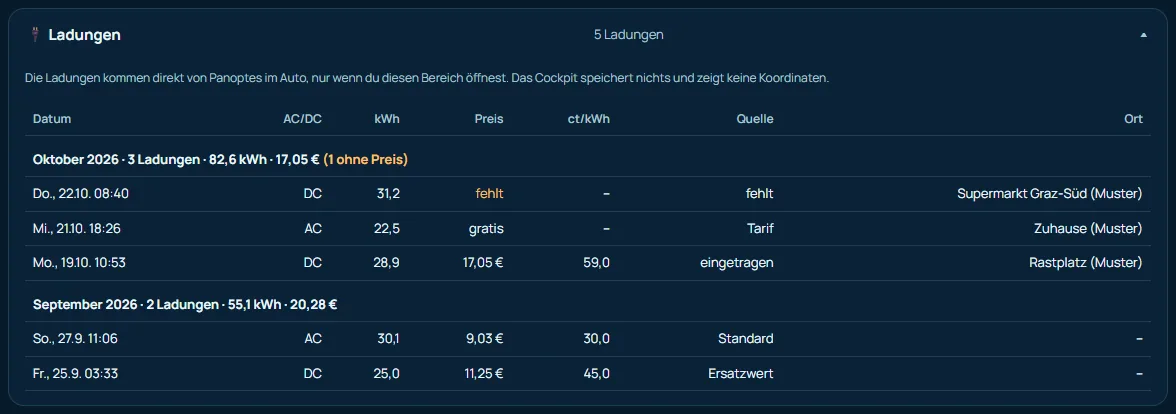
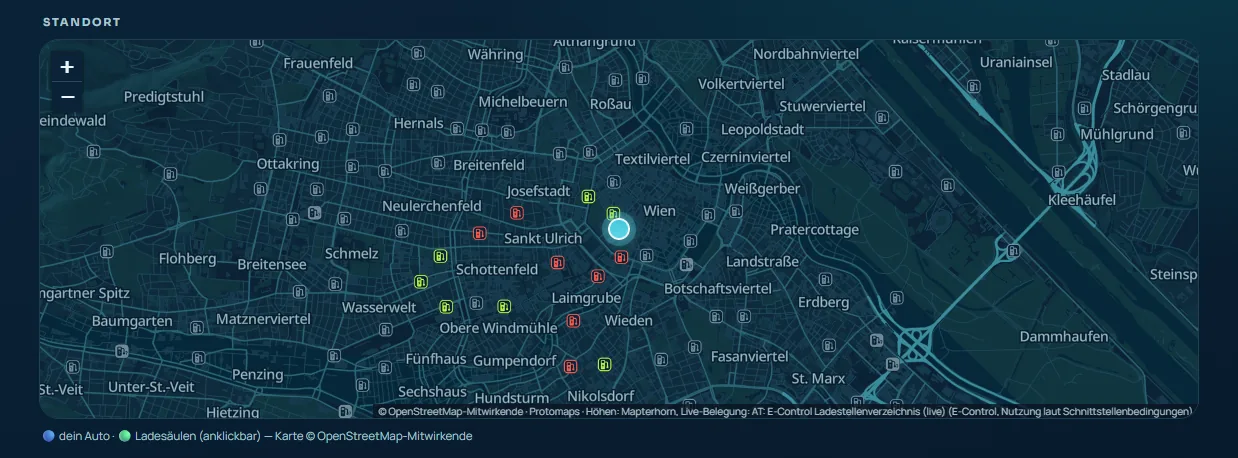
Version 1.15, with sample data (sample location Vienna, made-up car).
Optional extras (all can be switched off)
- 💶 Electricity price: When is charging cheapest? The power-exchange price of your country as hourly bars, also for tomorrow. Only for dynamic tariffs: it appears once you switch on “I have a dynamic electricity tariff – show spot price” (off by default; then nothing is fetched).
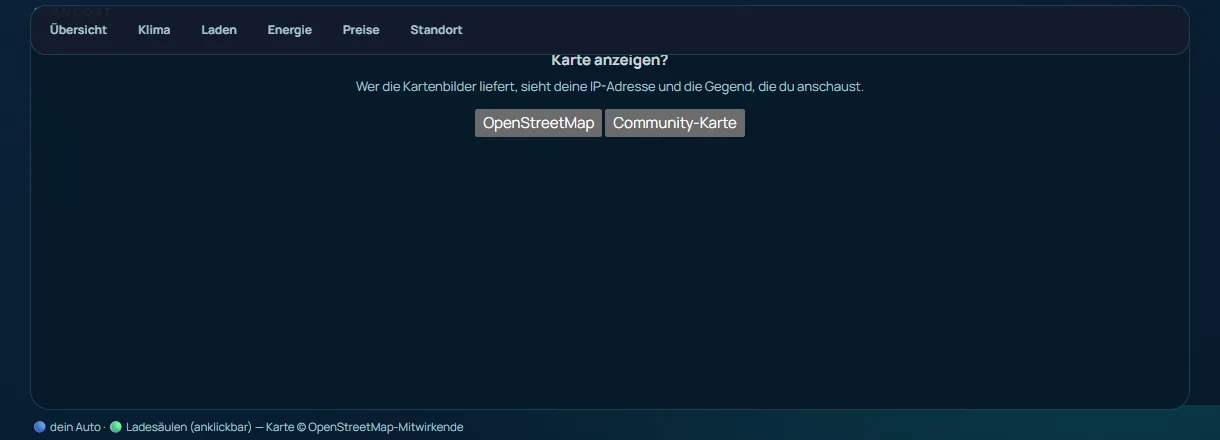
To be honest: This is the exchange price, not your bill (grid fees and taxes are missing). Only with an exchange-based tariff (Tibber, aWATTar, smartENERGY) is this your real price curve. - 🔌 Chargers nearby on the community map. In Austria, Switzerland and Germany with live occupancy (free, occupied, out of order or "status unknown").
To be honest: Live data exists only where it is openly offered (AT: E-Control, CH: BFE, DE: MobiData BW, including EnBW, CC BY 4.0). You see prices in the route planner (German). - 🗺️ Plan a route for members of the map, right in the cockpit. The planner knows your charge level, learns your real consumption and sends the route to the car (with Panoptes). Only one number goes to the planner (your correction factor). Your trips stay on the PC.
- 📱 Get it on your tablet: one tick, and it also works on a tablet in your own Wi-Fi. Without the tick, the cockpit can only be reached on your own computer, which is the safest.
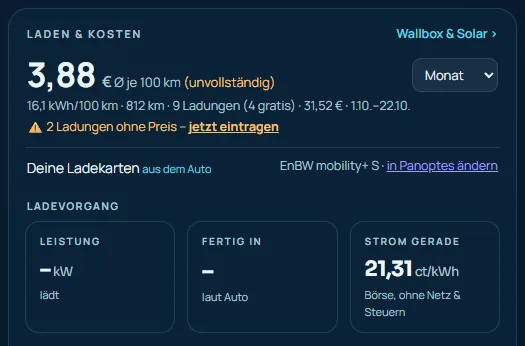
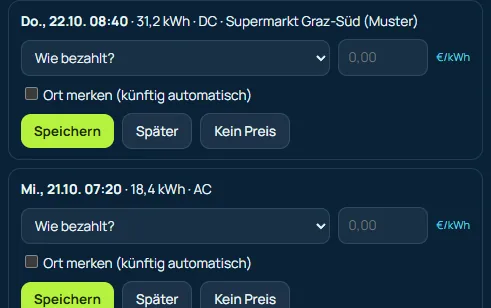
- 💶 What does driving cost? (with Panoptes): average € per 100 km for the month, 30 days or the year, kWh per 100 km and the list of your charges. The calculation is done in the car. You can add charges without a price directly in the cockpit ("Where did you charge?", needs Panoptes 0.1.10 or newer).
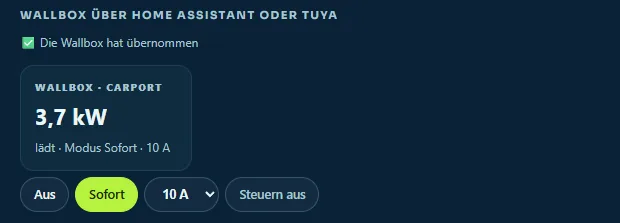
- ⚡ Control the wall box via evcc, Home Assistant or Tuya (directly in your home network, without the Tuya cloud): charging mode, charging current or charging target.
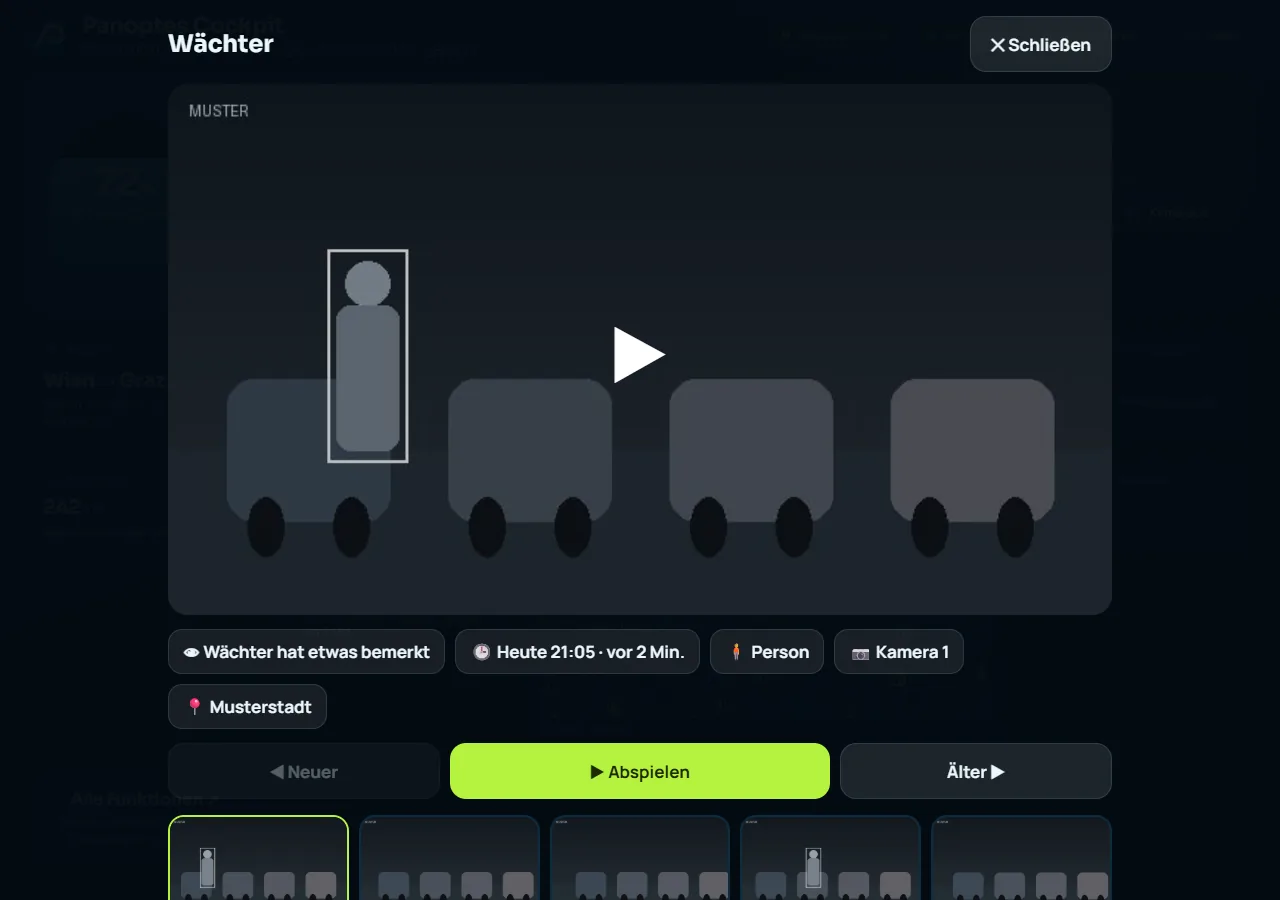
Safe: The default is read-only. Every charge point has to be allowed one by one, every change asks for confirmation and is written to the log. Keys stay encrypted on the PC. Heat pumps and immersion heaters are never controlled. - 👁️ Guard (with Panoptes): the latest event and all recordings of the 360° cameras in the cockpit. Without Panoptes, tinkerers have the old way via adb and a USB stick. If that means nothing to you: just leave it out.
Your data stays with you
The program runs on your computer and saves everything there. It sends nothing to us. It only talks to the places you set up yourself: BYD cloud, Home Assistant, Panoptes in the car, your wall box in the home network and, if you want, the route planner.
Do you have to trust it? The program asks for your BYD login. That is why the whole source code is open on GitHub.
The file evcockpit.py in the package is normal, readable text. Found a bug or have a question? Report it as an issue.
For advanced users: real solar (PV) system, tariff and wall box with Home Assistant
Do you have a solar (PV) system, an electricity tariff, maybe a battery and a wall box? Then bring everything onto one screen, with your real live numbers. The free hub for this is called Home Assistant. It simulates nothing, it reads your real devices.
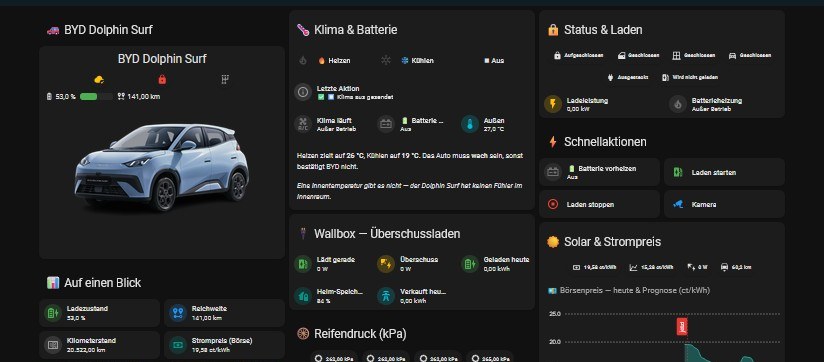
| What you have | Gets connected for real (examples) |
|---|---|
| 🔆 Inverter / solar (PV) | Fronius, SMA, Huawei, SolarEdge, Kostal, Goodwe, Victron, Sungrow … |
| 💶 Dynamic tariff | Tibber, aWATTar, EPEX, Nordpool, Octopus |
| 🔋 Home battery | usually through the same inverter |
| 🔌 Wall box | go-e, Easee, KEBA, Wallbox, openWB, Tesla Wall Connector … |
| 🚗 Car | your BYD app login |
What you need: a small "Home Assistant Green" box (about €90–130, one-off), the login details of your own devices and about 1–2 hours for the first set-up. Everyone has to do this step for their own system. Nobody can do it for you, unless someone stored all passwords in one central place, and we advise against that.
No solar (PV) system yet? Do the maths first
Before you spend €10,000: Home Assistant can calculate whether it pays off, using your real consumption, the real exchange price and your real kilometres. Only the system itself is assumed (for example 5 kWp and a 10 kWh battery).
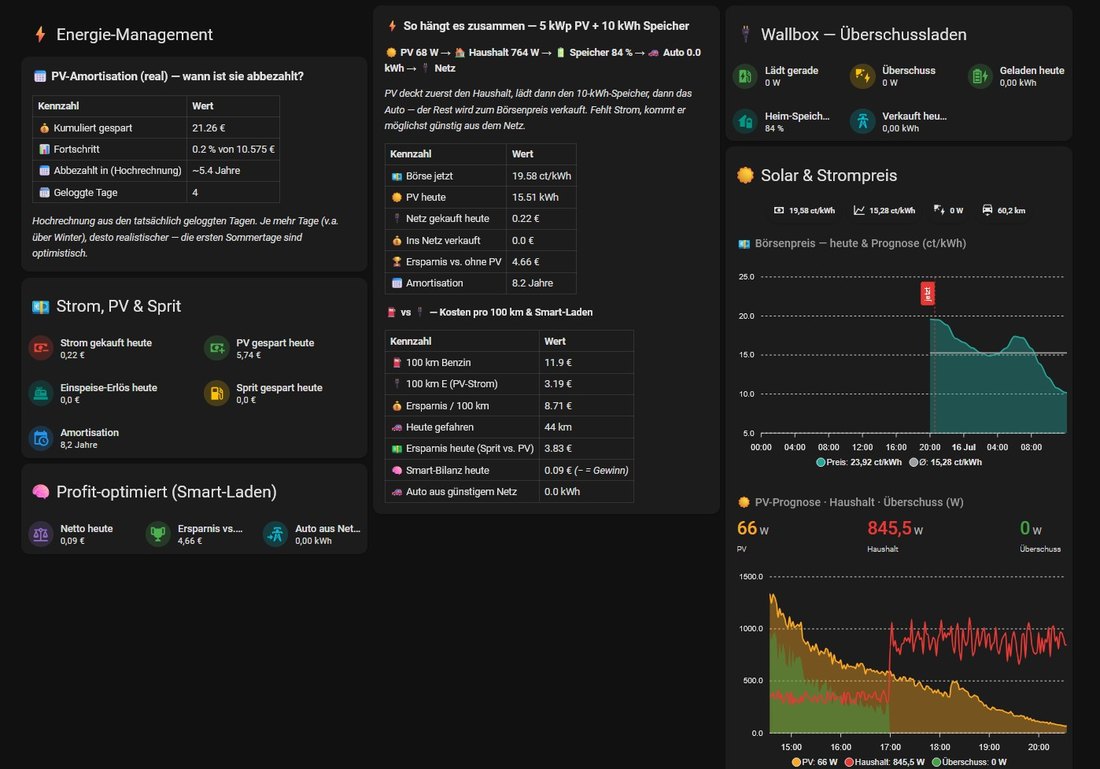
A calculation like this answers: When is the system paid off? What do I save per 100 km? Is a battery worth it? When is the cheapest time for the car to charge? A simulation is not an offer. Real numbers depend on roof, direction, shade, tariff and subsidies.
For tinkerers: source code and joining in
The whole source code is on GitHub (MIT licence). Linux, macOS and Raspberry Pi start with one command. Your own ideas are welcome: report a bug.
The earlier "complete package" to build yourself (July 2026) no longer exists. Everything it could do is now in the EV Cockpit and, directly in the car, in Panoptes.